If you're not using WPML or Wordpress and would like a translated locator, take a look here: https://storepoint.co/blog/multilingual-translated-store-locator-app/
Step 1: Login or create your Storepoint Store Locator account
If you already have a Storepoint Store Locator setup, simply login to the dashboard. Otherwise, you can create an account here. Once you have your store locator setup, come back here to get translating!
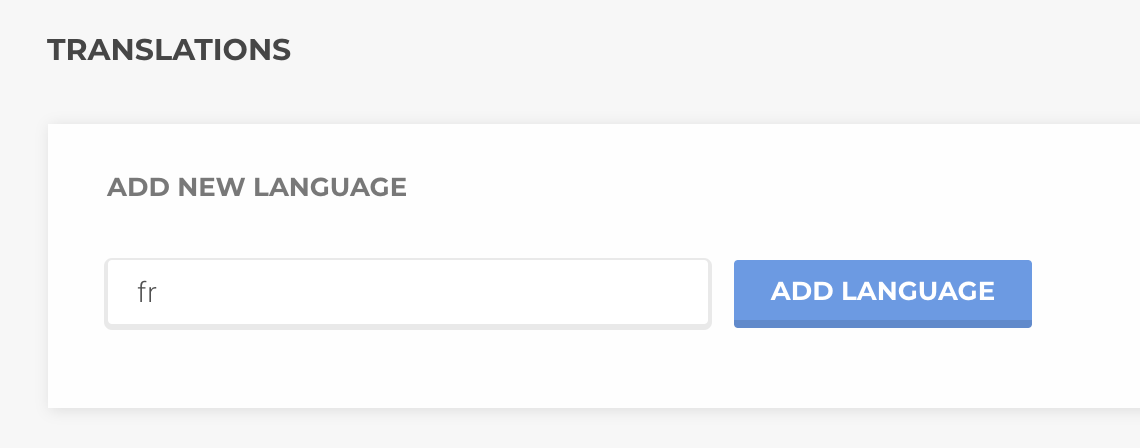
Step 2: Add Your Language(s)
In the Storepoint dashboard, head over to the "Translations" page: https://storepoint.co/dashboard/translations
When adding a language, instead of using a "language name", make sure to use the WPML "language code". For example, for French, this would be "fr". This language code appears in your WPML language settings and is often part of the URL of your site (ie: example.com/fr).
Step 3: Enter your translations
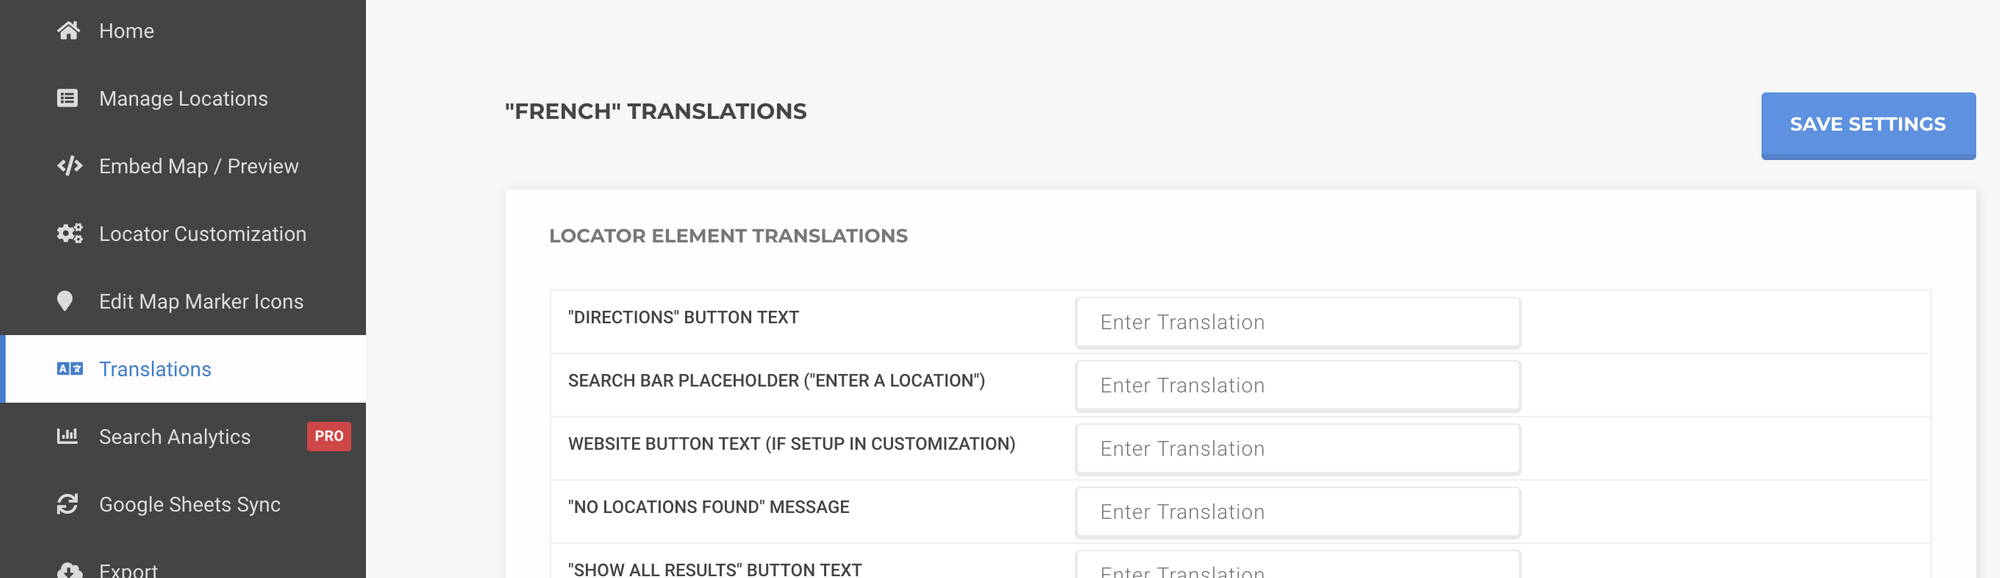
Add in your translations for the language you created and once completed, click "Save Settings".
All done!
Storepoint will automatically detect the WPML language that is active for any user on the site and will automatically show the translated version of the locator. Magic!
You can add as many translations as needed, simply repeat Steps 2-3 for all the languages you'd like to add.
]]>Storepoint store locator makes it simple to translate your locator into multiple languages and integrate it with the translated versions of your website. Whether you're using Wordpress, Shopify, Squarespace, Webflow, Wix or any other platform, you'll be able to create translated versions of your store locator that work with your existing website language & translation system.
Step 1: Login to your Storepoint Store Locator account
If you don't already have an account or store locator, you can signup here and return to this tutorial once your locator is setup.
Step 2: Go to the "Translations" section of the dashboard
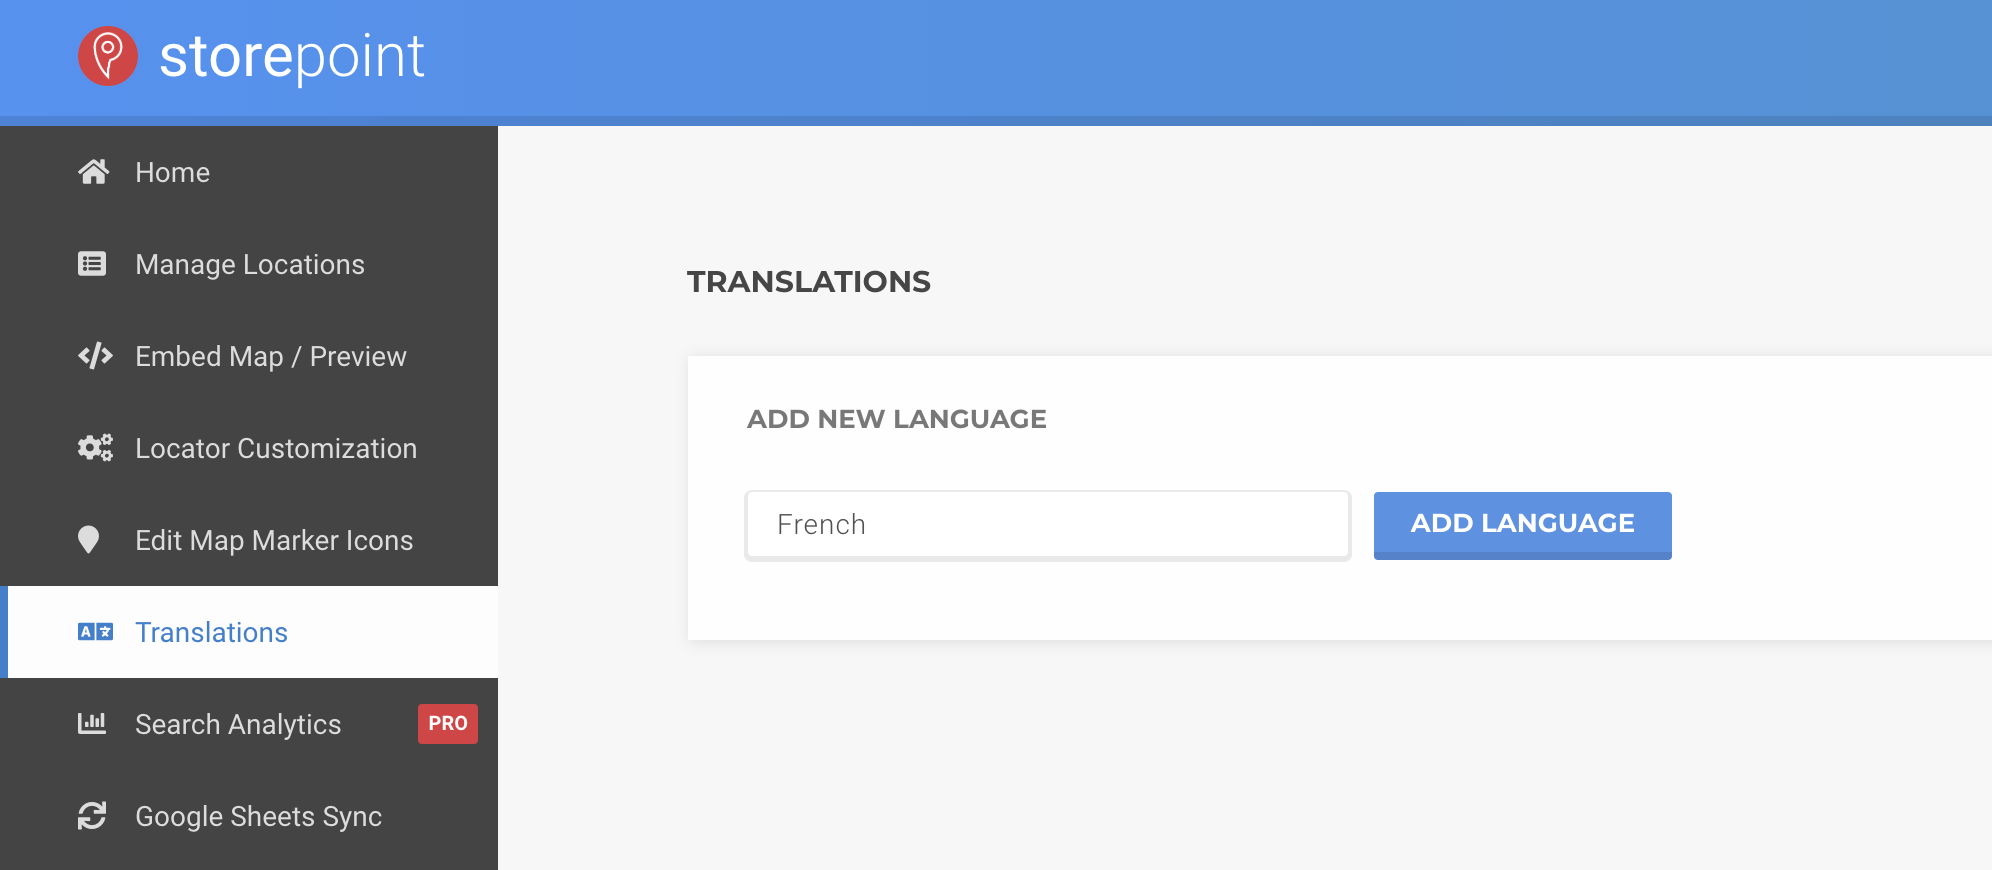
If you haven't already, enter your new language name or code you'd like to use. For example, enter "French" or "fr" and click "Add Language".
Step 3: Create your translations
Once a language is added in, you can start creating translations for the various locator elements, your category names, days of the week and much more...

Once all your translations are entered in, simply click "Save Settings".
Step 4: Embed your language-specific translated store locator
Some language translation systems, like WPML, will automatically use the translated version of the locator on your site. If you have a separate page or editor for the translated version of your site, you can use the language-specific embed code.
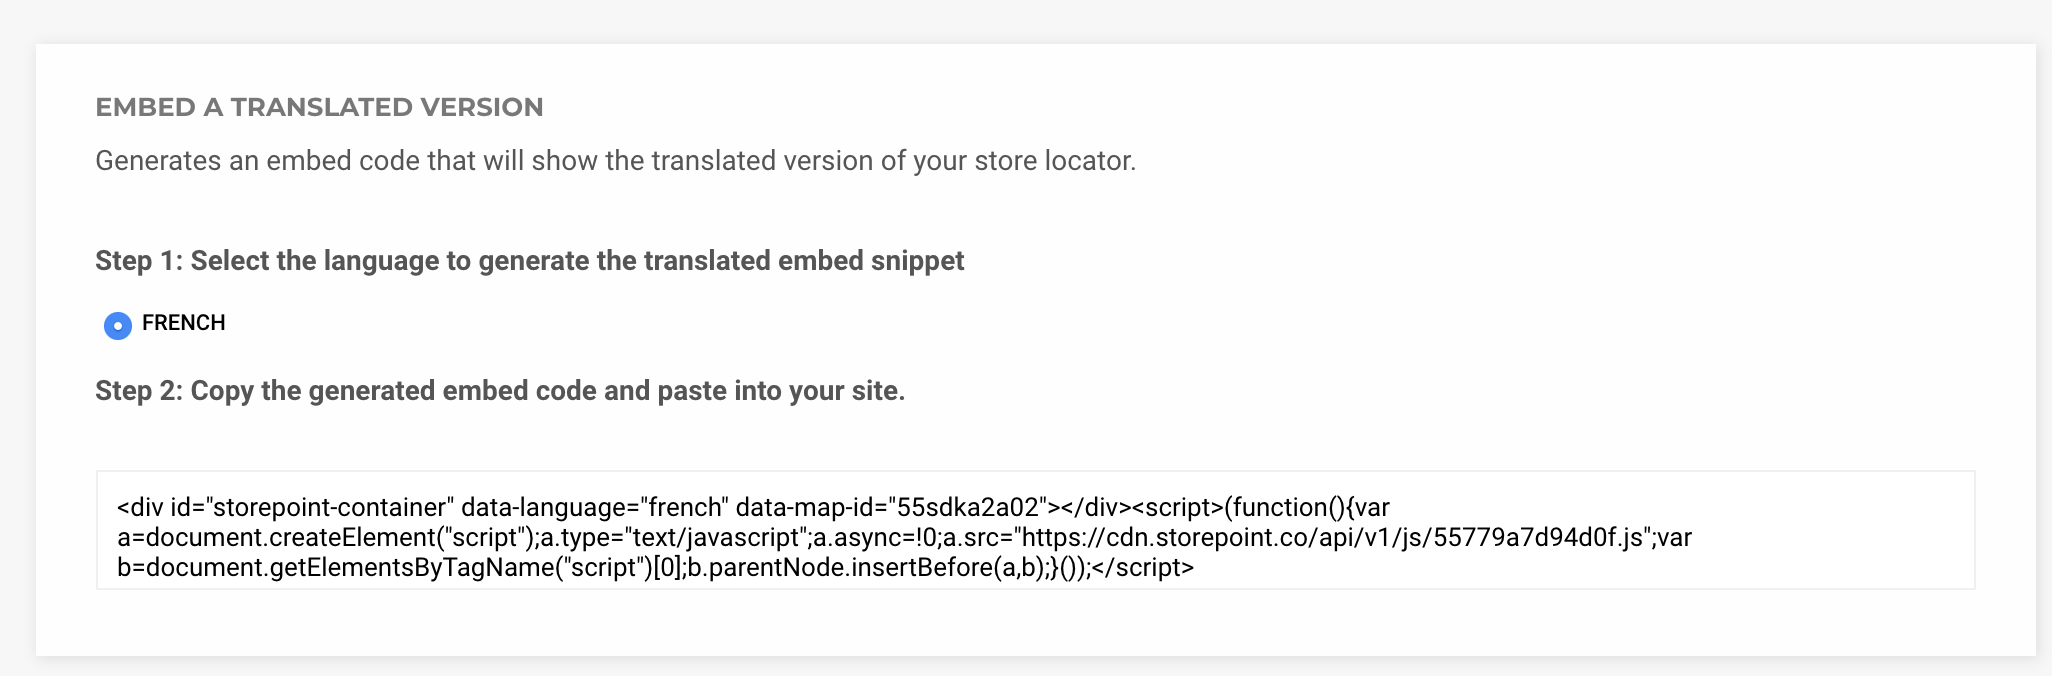
To embed a translated version of your locator, go to the "Translations" page of the Storepoint dashboard: https://storepoint.co/dashboard/translations and look at the "Embed a translated version" section of the page (screenshot above)
Here, you simply select the language for which you'd like to generate a language specific embed code. Once selected, copy the generated embed code and embed/paste it into your site as you did with the initial embed code wherever you'd like the translated version to appear. Full embed instructions and tutorials available here in your account: https://storepoint.co/dashboard/map
Some translation systems work differently and we can help get Storepoint connected to your system - simply contact us at [email protected] and we'll be happy to help!
]]>If you're looking to create a beautiful and customizable store locator or directory within your Webflow site, the easiest way is with the Storepoint Store Locator App for Webflow. A great example of the customized locator on a Webflow site is the Plucker's Wing Bar store locator (from the showcase: https://webflow.com/website/pluckerswingbar). Below, we'll go over the quick steps for adding a store locator app or directory to your own Webflow site.
Step 1: Create a Storepoint Store Locator Account
The first step is to setup your Storepoint Store Locator account. This is where you will manage or upload your locations and where you can setup all the settings for your store locator / directory. You can signup for an account here: https://storepoint.co/signup
Step 2: Manage, bulk upload or sync your locations
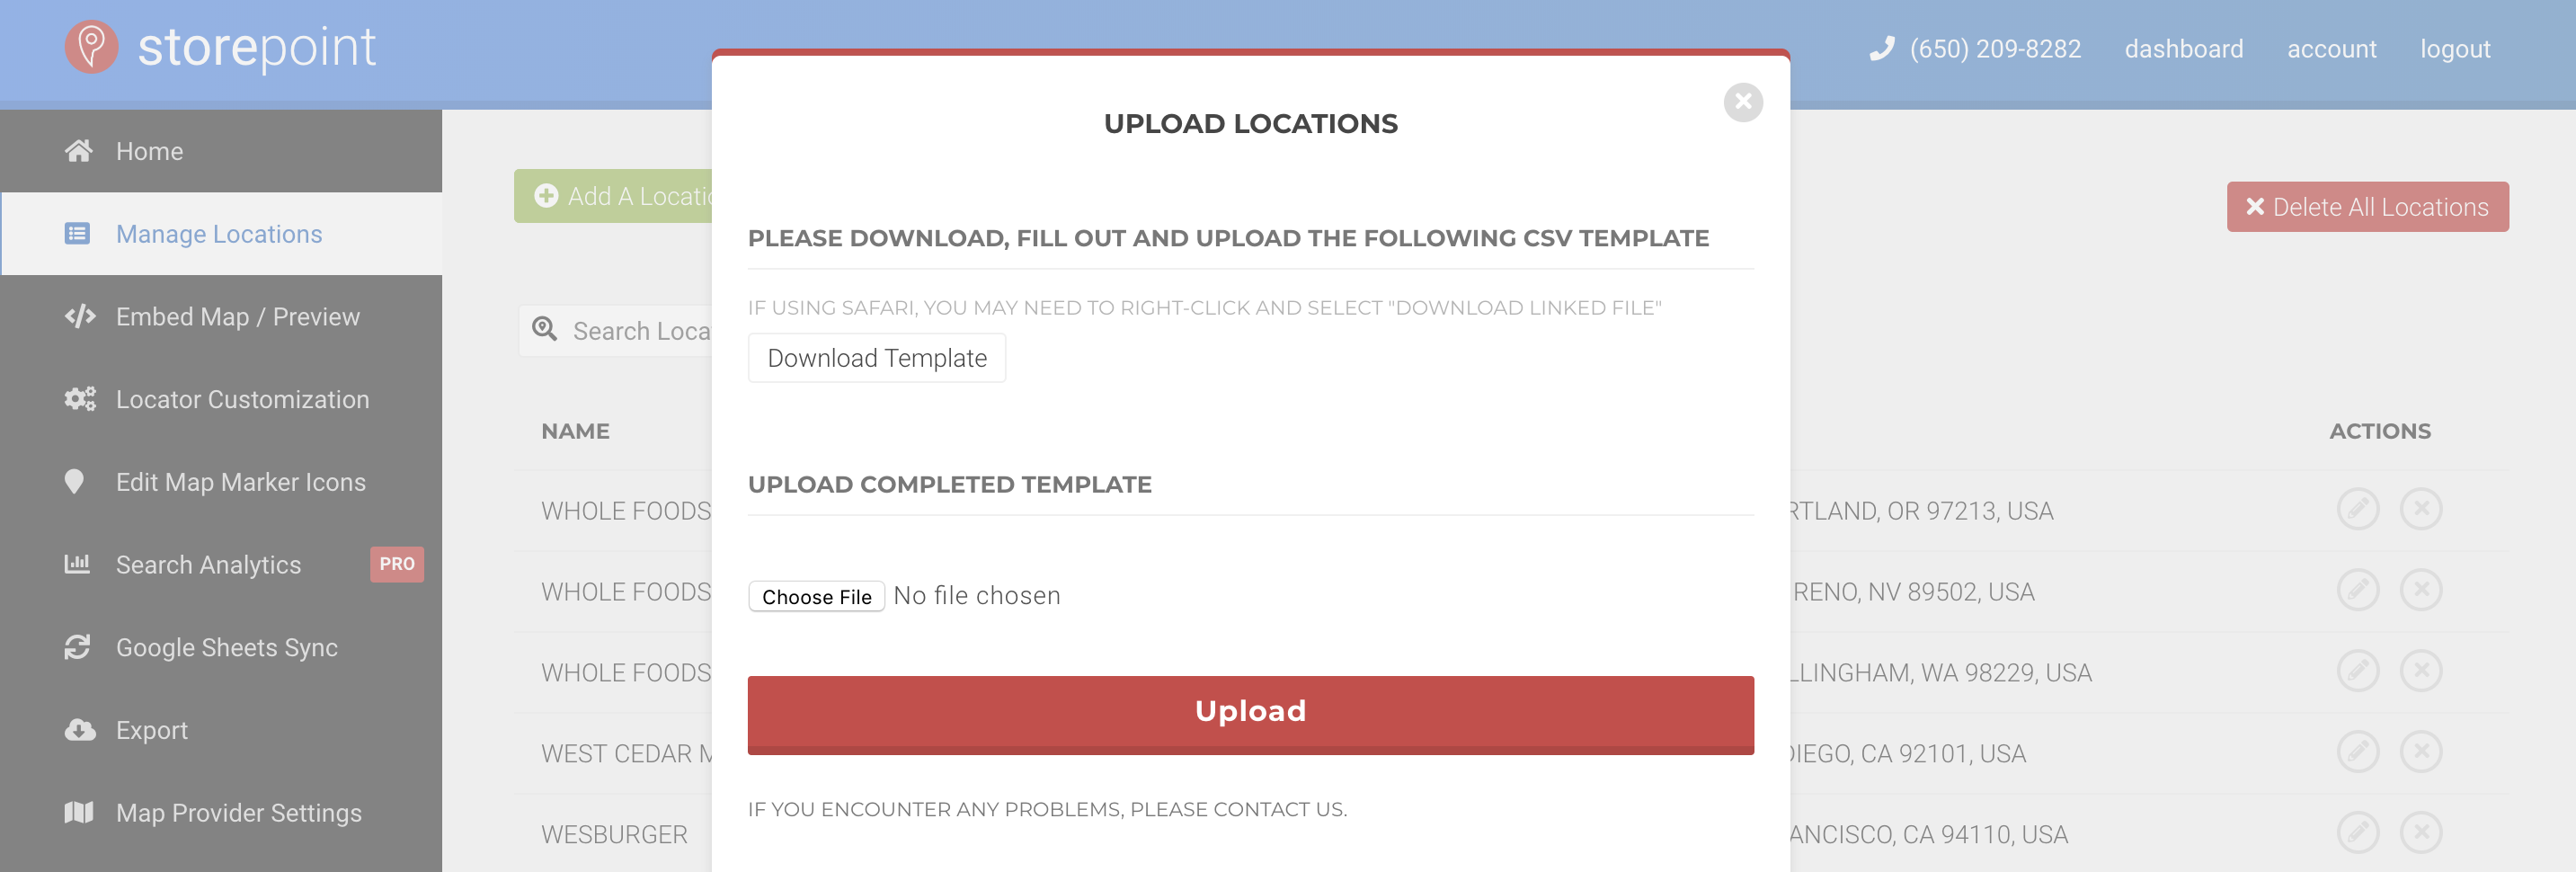
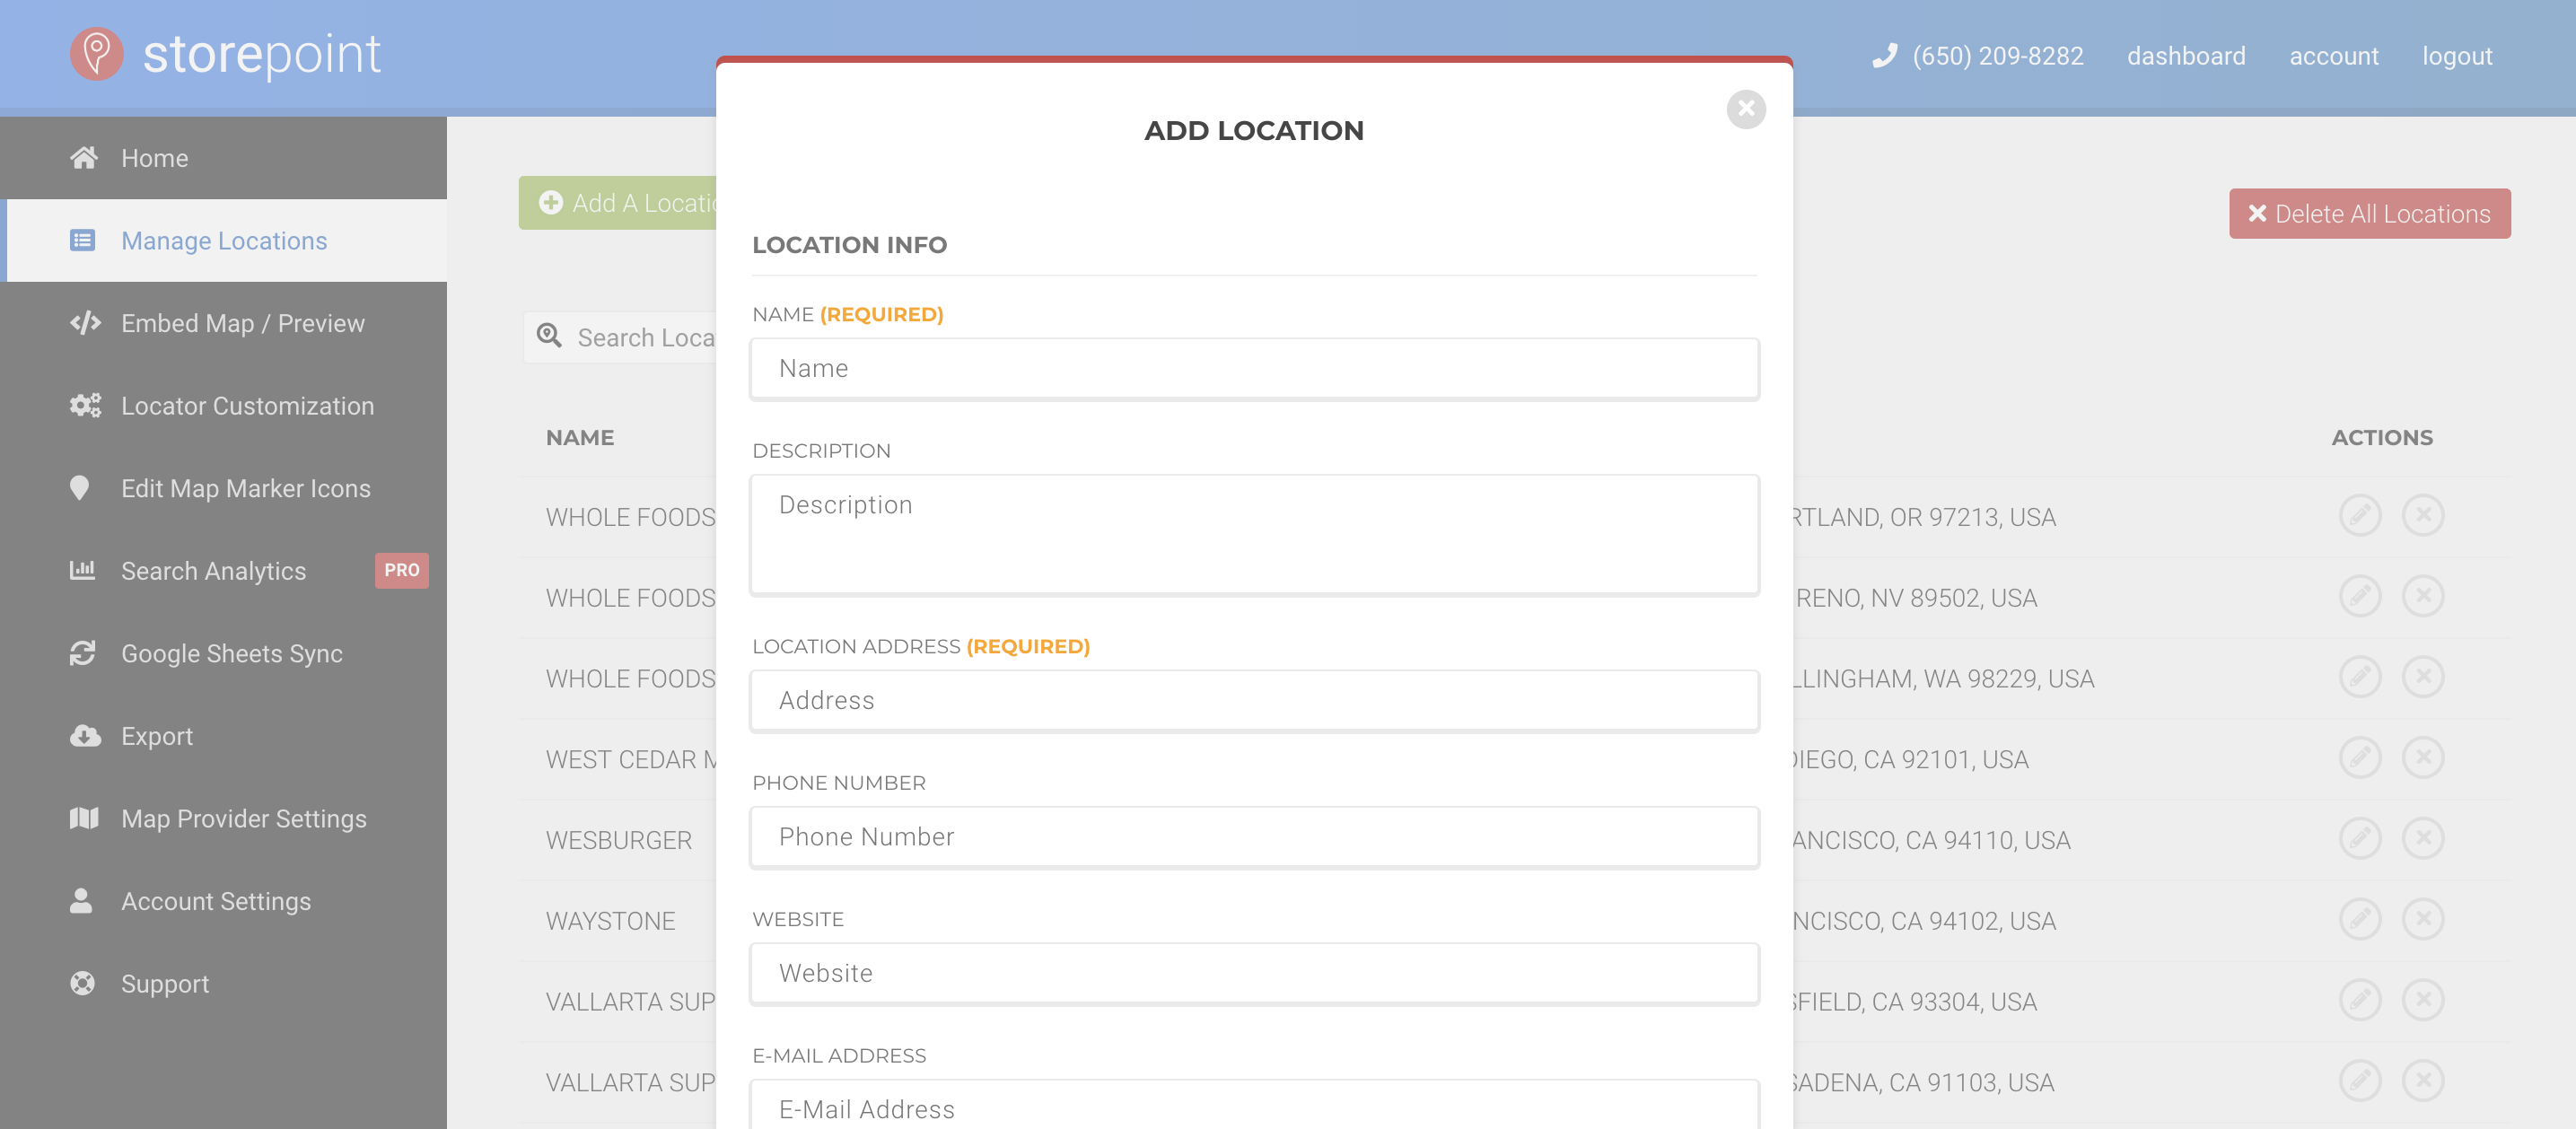
With Storepoint Store Locator for Webflow, you can either bulk upload from a spreadsheet or CSV, add/edit locations individually in the admin panel or sync locations from a Google Sheet. You can also setup categories for the locations, which can then be filtered on the store locator. The interface is setup specifically for managing locations and is a pleasure to use.
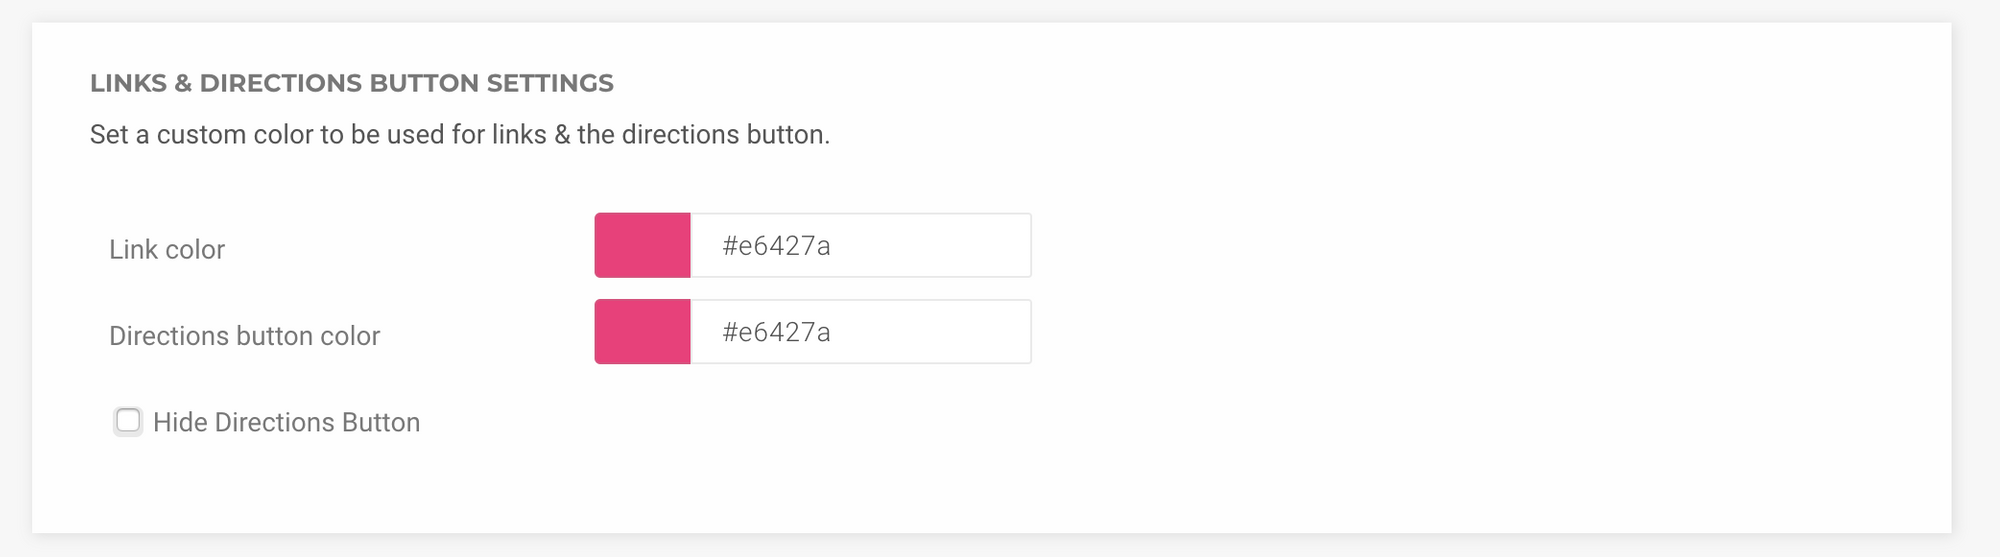
Step 3: Let's pick some basic settings to start
In the "Locator Customization" tab in your store locator account, you can now pick some basic settings for your store locator / directory. Here, you can adjust default radiuses, regional settings (like showing distances in kilometres vs miles) and much much more...
Step 4: Copy your store locator embed snippet
In your Storepoint account, navigate to the "Embed Map" page or click here: https://storepoint.co/dashboard/map
Select and copy the "Embed Snippet" for use in Step 5.

Step 5: Embed the store locator on your Webflow site
- In your Webflow editor, navigate to the page where you'd like to embed the locator and click the "+" (Add) icon in the top left corner of the Webflow editor.
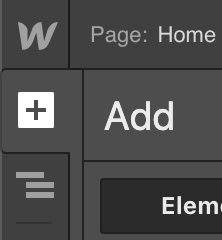
2. Scroll down the list of components and near the very bottom, you'll see an "Embed" component. Simply drag and drop this component into the area of the page where you'd like the locator to display.
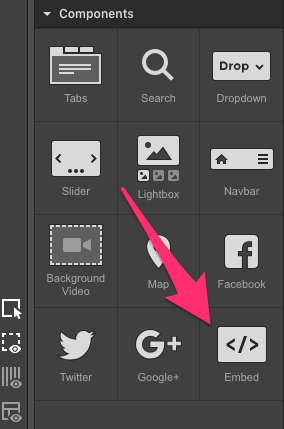
3. Paste the "embed snippet" you copied from Storepoint in Step 4 and Save.
4. All done!
Step 6: Questions & Further Customization
Included with all plans, we'll fully customize every detail of the locator to match your Webflow site, theme & branding.
Now that you've embedded the locator, simply send the URL to our team at [email protected] and we'll customize the entire locator to match your Webflow theme, fonts, colors, branding and any other requests you may have. This service is included free with all our plans and is unique to Storepoint. Take a look at some of our store locator design examples here.
Done :)
If you have any questions or if you're wondering what we can do for your use-case in building a store locator, directory or map for Webflow, contact us and we'll be ready to help: [email protected]
]]>Below is a screenshot of a
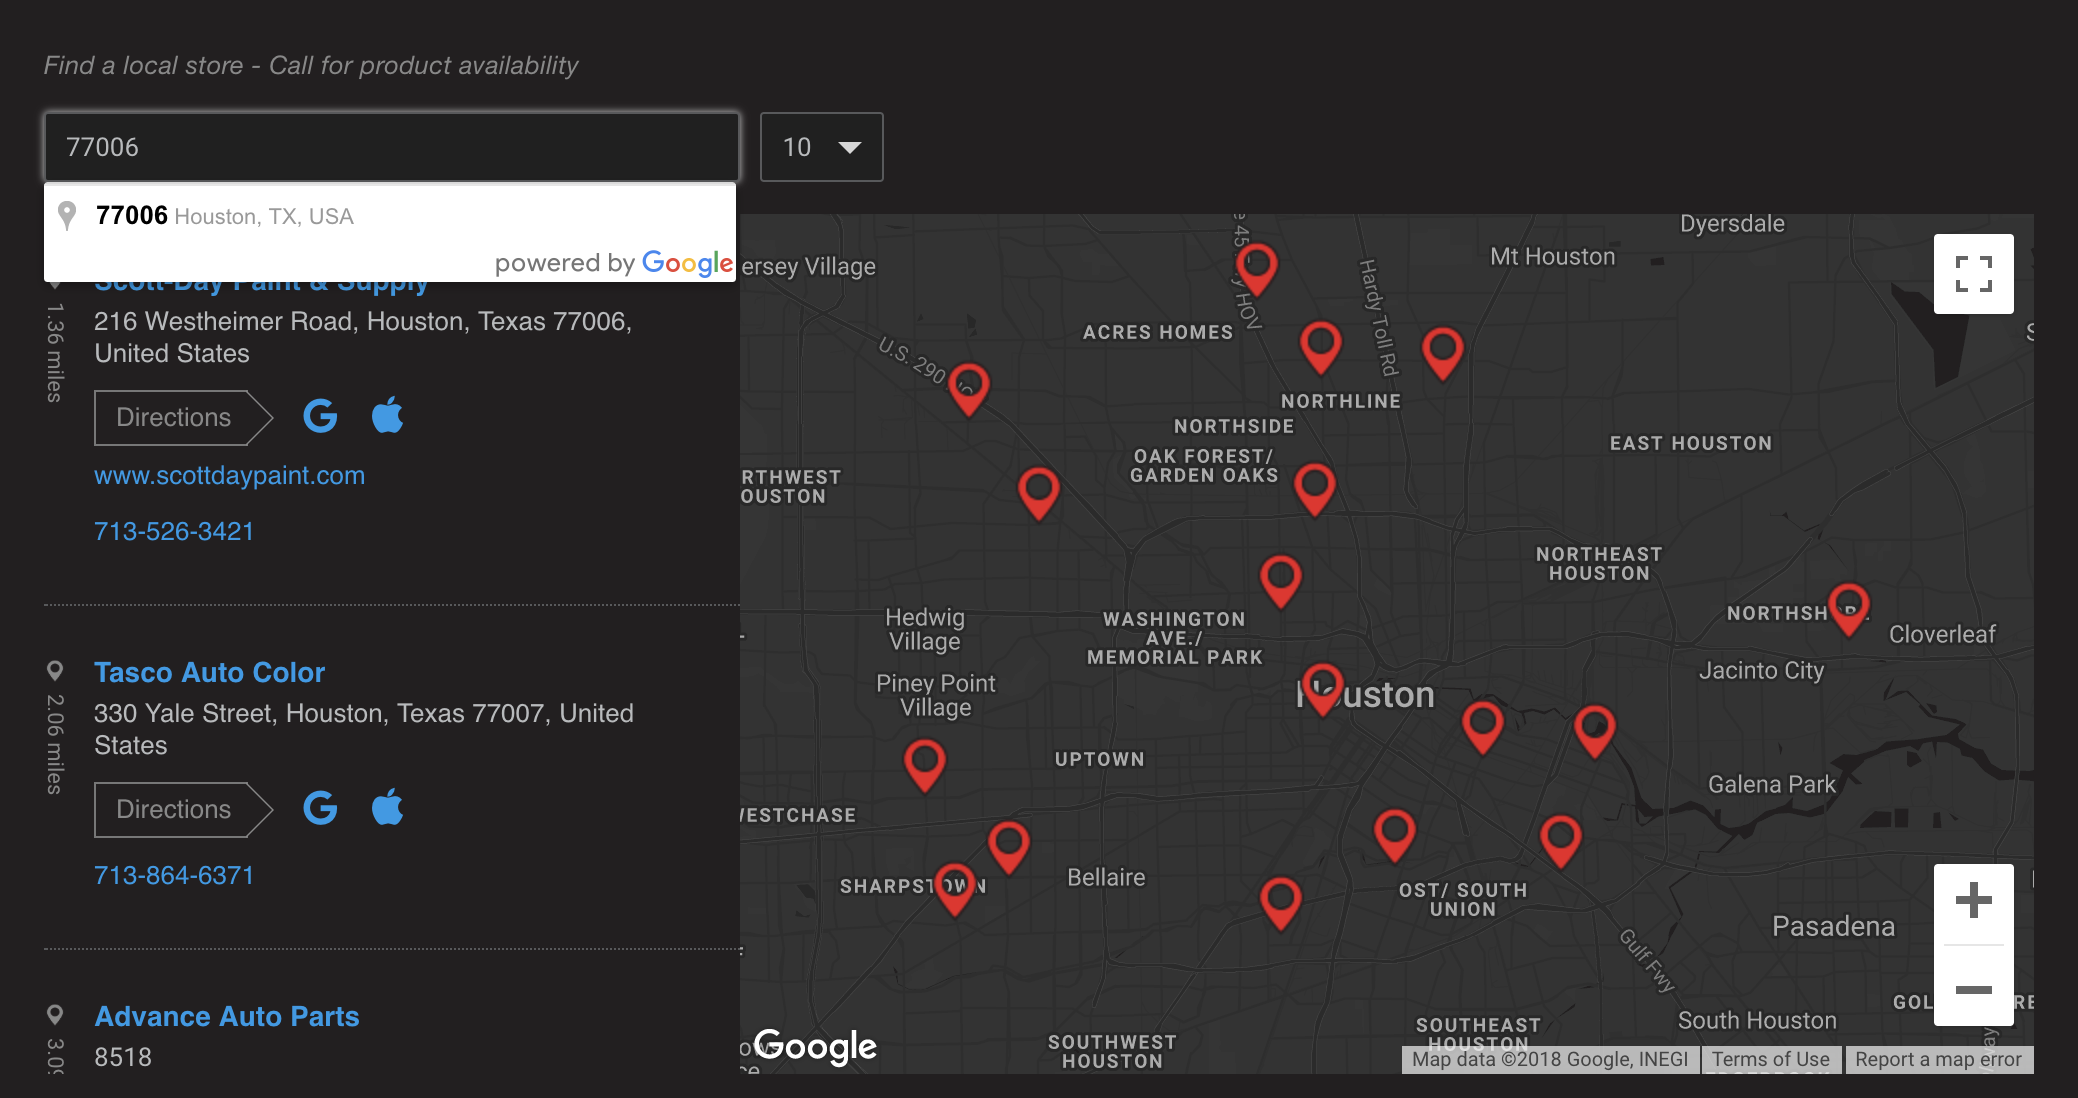
]]>Below is a screenshot of a resulting zip code locator. You can also try out this example live here: https://locate.por15.com
Step 1: Get a Storepoint Locator Free Trial
The first step is to sign up for your Storepoint free trial. You can get started here: https://storepoint.co/signup
Step 2: Add or upload your locations
You can add locations/stores for your zip code locator via bulk uploading a spreadsheet or setting up a google sheets sync. You can also add locations one by one but that can take a while if you have many locations.
Step 3: Add the zip code locator to your website
On the "embed map" page in your storepoint dashboard, you'll see an embed snippet. Simply copy-paste this snippet into a "custom html" element on your site or a "html editor" within your site. Feel free to contact us at [email protected] and we'd be happy to provide a platform specific tutorial or even help you out with adding it to your site :) Learn how to add a store locator to your website with these tutorials. If you're on Squarespace, learn how to add a store locator widget to your squarespace site here. If you use Wordpress, learn how to add a store locator plugin to wordpress here.
You can also simply link to our hosted version if you'd rather not embed it on your site. This way, you can simply link to our store locator from your site.
All done!
You can now customize your design on our settings page or enable certain features like categories, filtering and much more...
Our support team is also here to help at any time so feel free to reach out to us with any questions you may have!
If you have any questions or if you're wondering what we can do for your use-case in building a product locator, store locator or map for squarespace, contact us and we'd be happy to help: [email protected]
]]>Common Storepoint Store Locator Software Use Cases
Product Locator
A product locator is a store locator designed not only to help customers find nearby stores with your product, but also to give customers the ability to search for specific products. This could be a variation in flavor or model of your product.
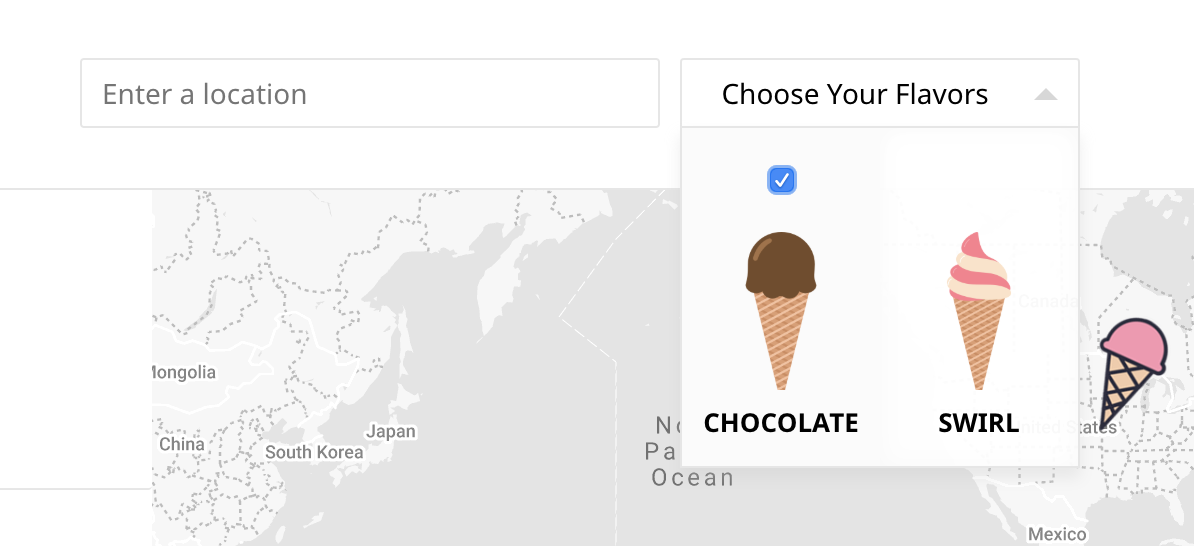
In the example, above from our demo (https://storepoint.co/demo) we have setup a "choose your flavors" dropdown which allows customers to filter by a specific product. As always, the format, layout and design of our locators is fully customizable and we support multiple dropdowns, different designs or even inline options.
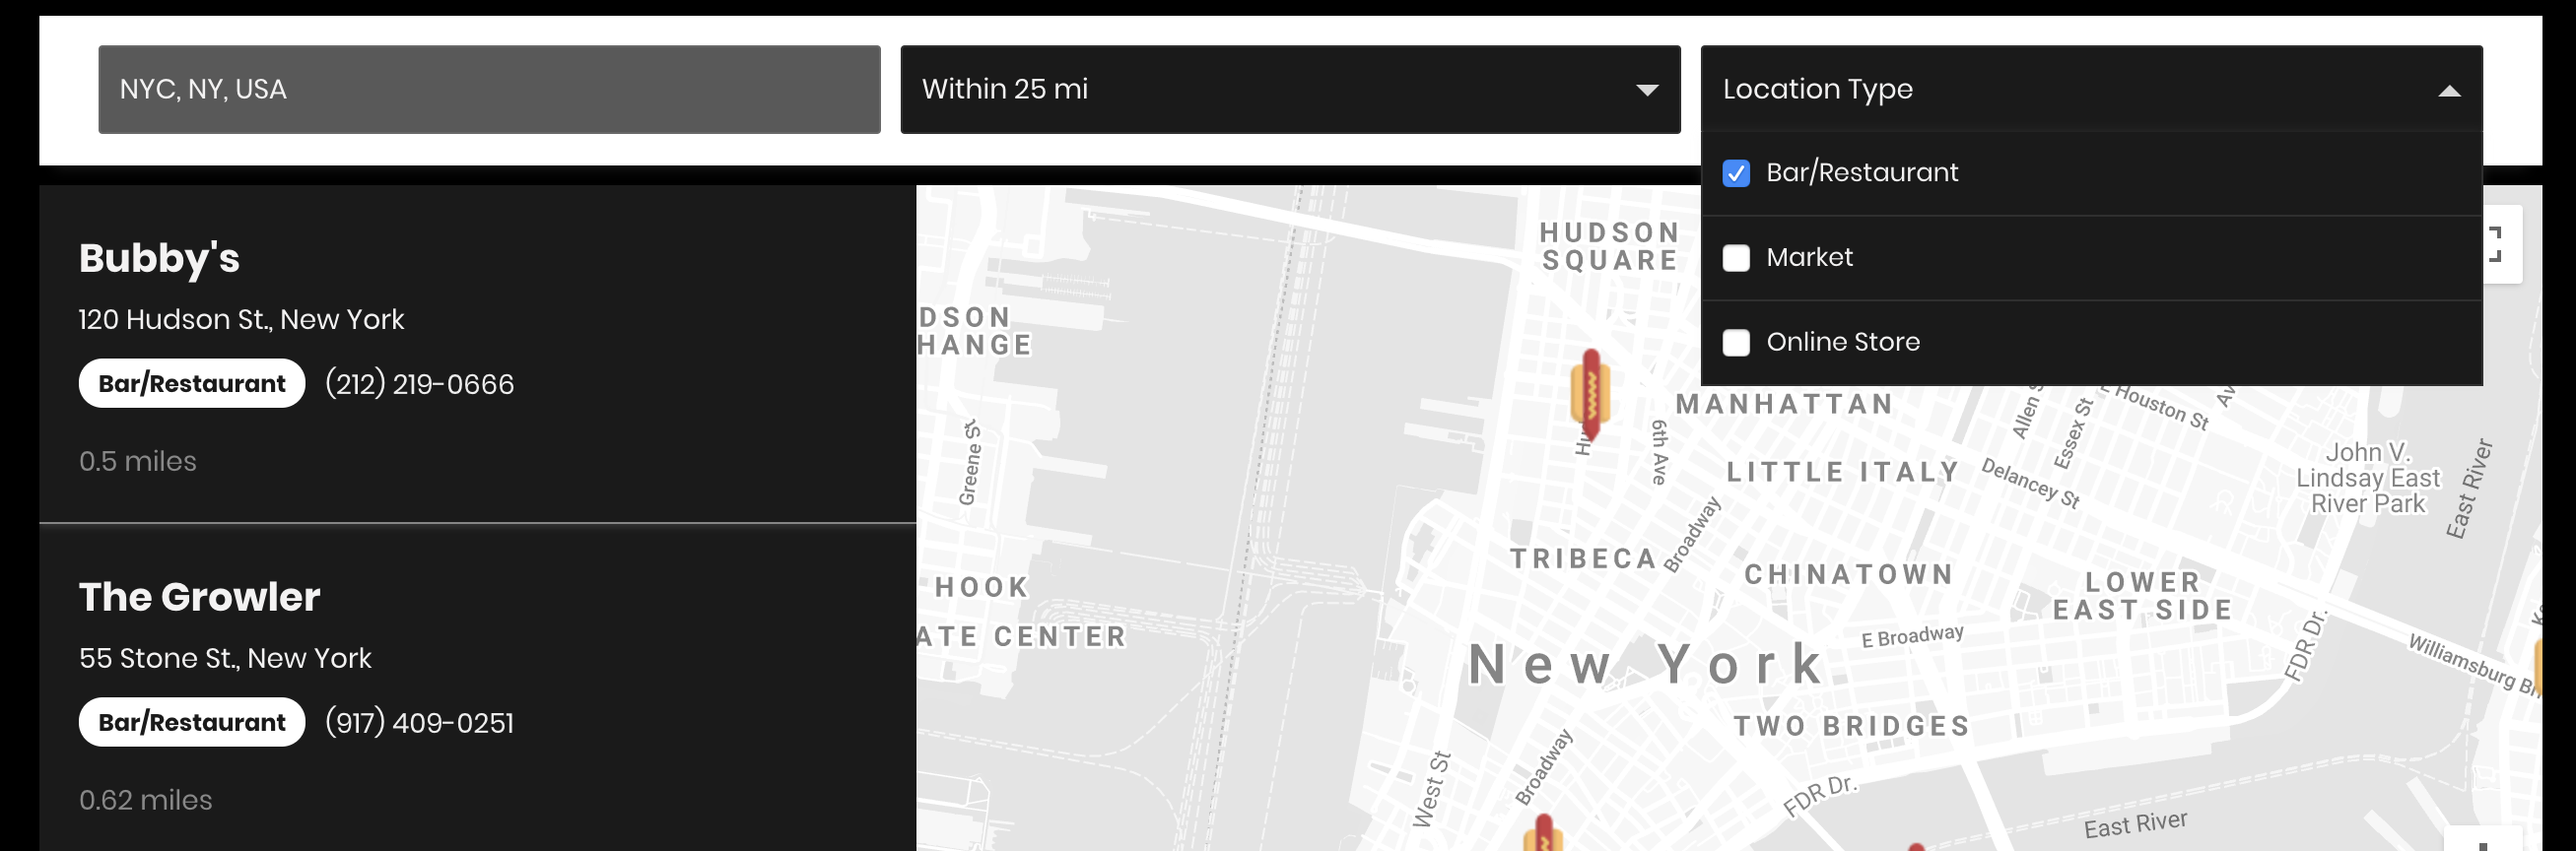
Store Locator with Multiple Location Types
If you sell your product in a variety of different types of locations, for example in stores, bars and restaurants, you'll want to give your customers an option to filter by those location types. With Storepoint, simply tag your locations with their type and this will automatically give your customers the ability to find exactly what they're looking for.
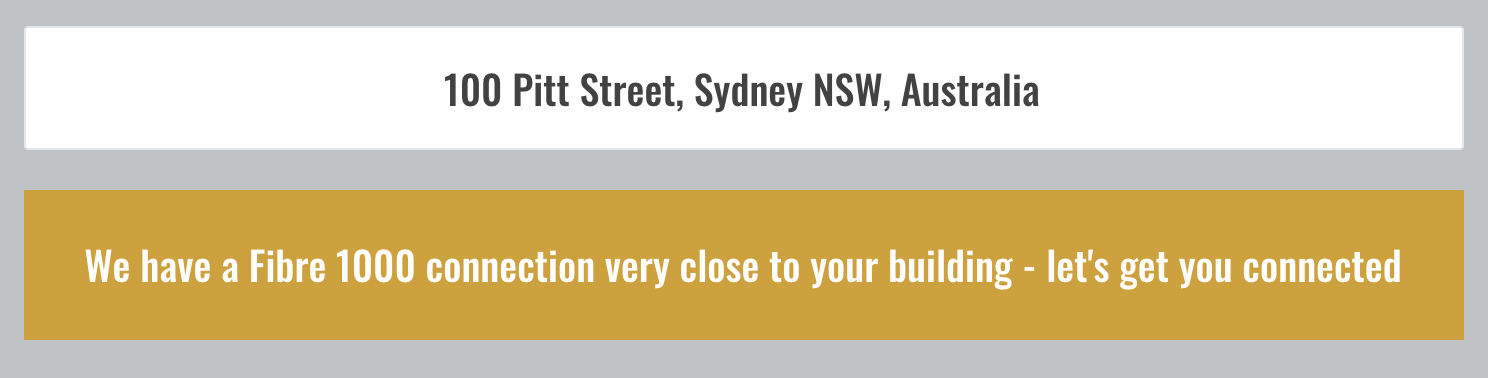
Delivery Area or Postcode/Zip Code Service Availability Check
Do you offer a service only available in specific areas or in specific Zip Codes? With Storepoint, we can help you create an interface that allows customers to lookup your service by Zip Code, Postcode or another format and determine whether your service is available in this area.

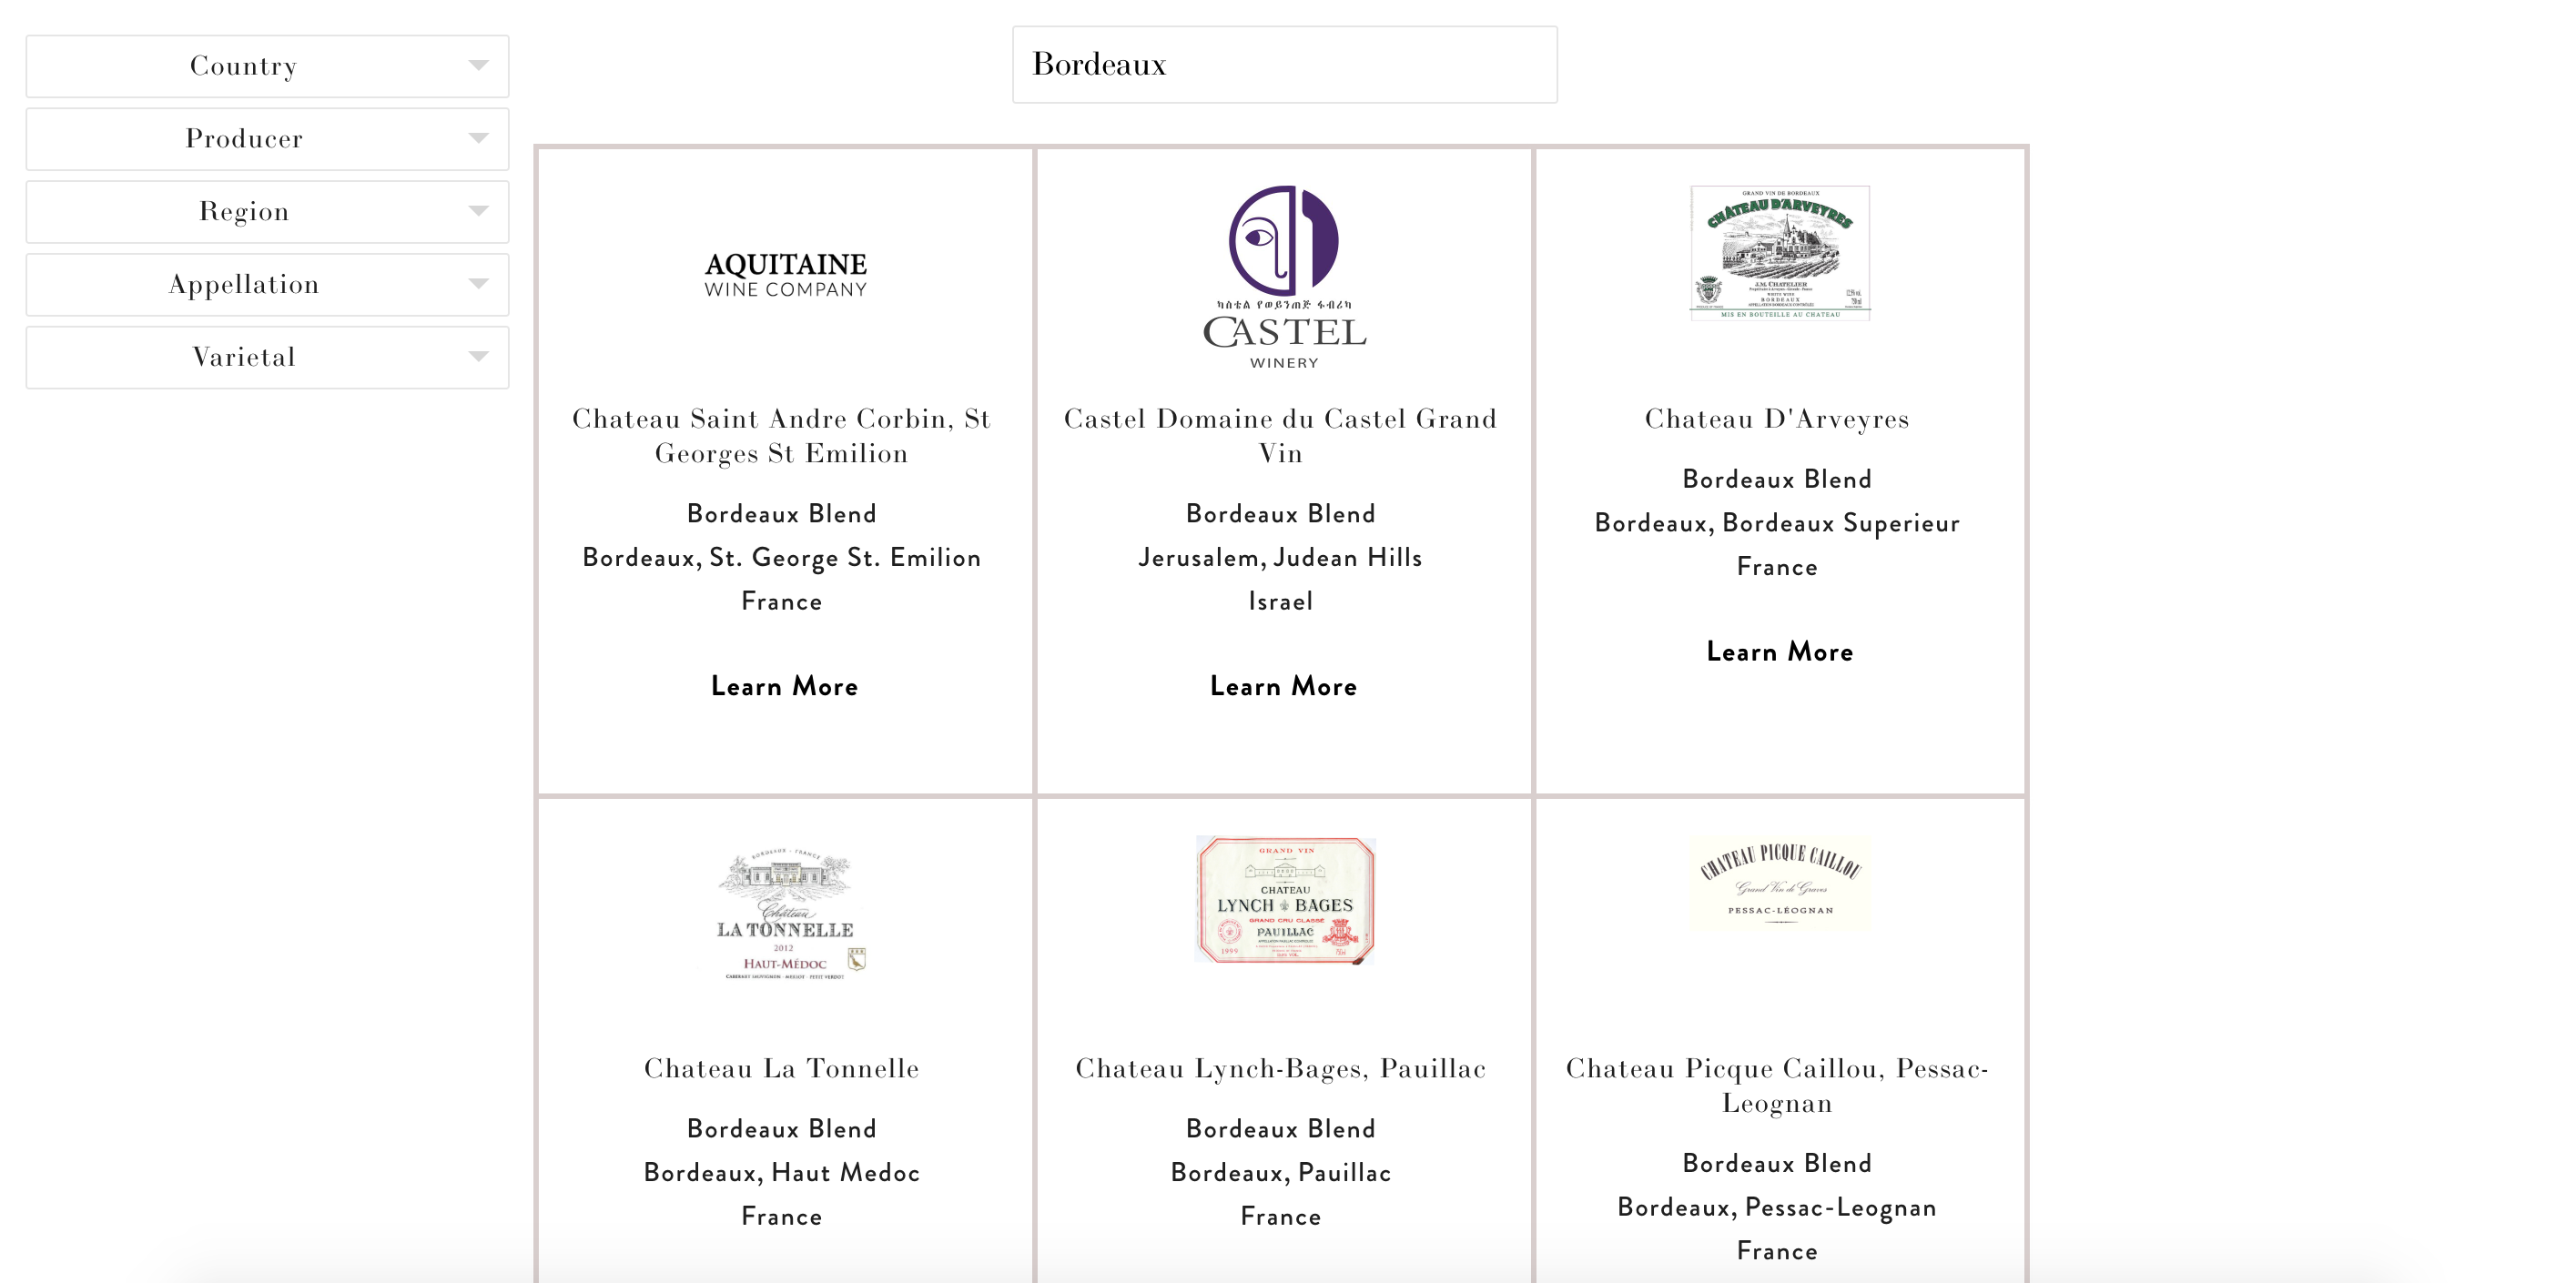
Create a Directory With Search and Filtering Options
If you're looking to create a directory of events, members, service providers, restaurants, or anything else you can create a directory for, we can put it together. We support multiple different filters as well as searching by keyword in addition to location.
Below is an example of a directory we put together that includes keyword search as well as various filtering for a large wine collection.
Many many other use cases
If you have any other needs that you think we could help you setup, please contact us at [email protected] and we'll see what we can do for you 😀
Here are some examples of the store locators we have put together with our store locator software.
]]>Now that you're looking for a store locator to add, you'd most likely love the locator to look just as good. Most importantly, the store locator needs to blend in beautifully with the exact same fonts, colors, layout ideas and branding used throughout your site.
To make this happen, we've created Storepoint Store Locator. You can learn about how to add a store locator to Squarespace in our quick tutorial.
]]>