
Our WordPress Store Locator widget works automatically with the WPML Multilingual Plugin so you can easily create translated versions of your store locator on Wordpress.
If you're not using WPML or Wordpress and would like a translated locator, take a look here: https://storepoint.co/blog/multilingual-translated-store-locator-app/
Step 1: Login or create your Storepoint Store Locator account
If you already have a Storepoint Store Locator setup, simply login to the dashboard. Otherwise, you can create an account here. Once you have your store locator setup, come back here to get translating!
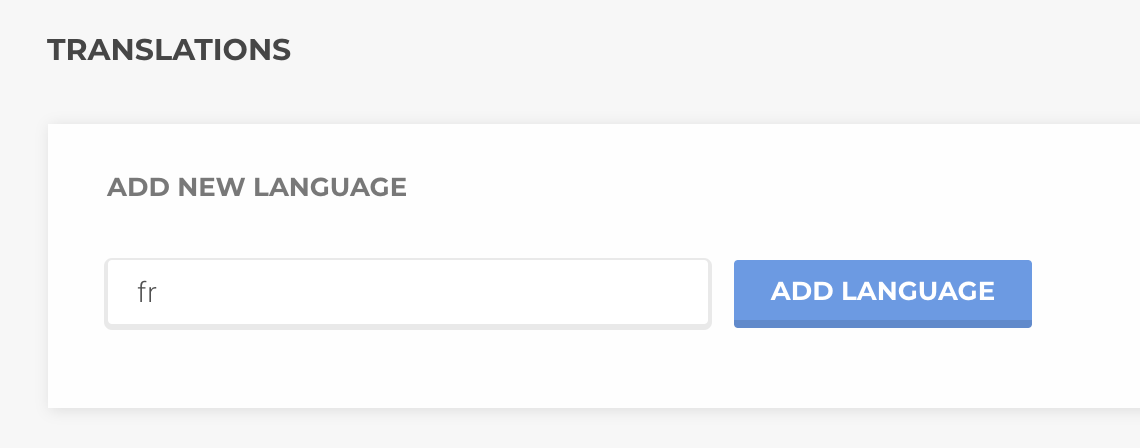
Step 2: Add Your Language(s)
In the Storepoint dashboard, head over to the "Translations" page: https://storepoint.co/dashboard/translations
When adding a language, instead of using a "language name", make sure to use the WPML "language code". For example, for French, this would be "fr". This language code appears in your WPML language settings and is often part of the URL of your site (ie: example.com/fr).
Step 3: Enter your translations
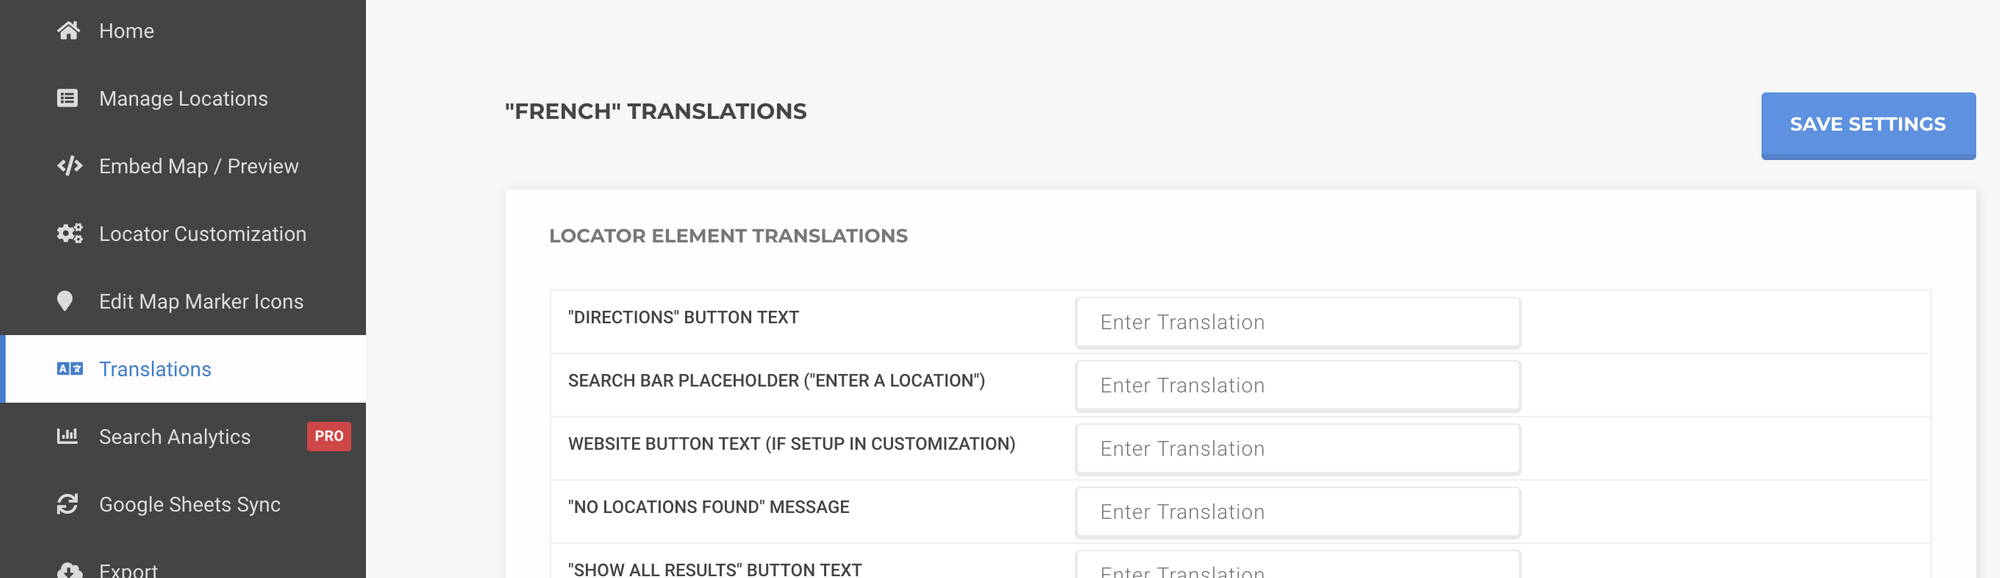
Add in your translations for the language you created and once completed, click "Save Settings".
All done!
Storepoint will automatically detect the WPML language that is active for any user on the site and will automatically show the translated version of the locator. Magic!
You can add as many translations as needed, simply repeat Steps 2-3 for all the languages you'd like to add.