If you're looking to setup a store locator for your Joomla website or a searchable map with multiple locations for your Joomla CMS website, this tutorial will show you how to get setup in minutes. No coding required :) We'll go over a few steps including adding or uploading locations and finally embedding it on your Joomla website.
Step 1: Add, Bulk Upload or Setup a Sync for your locations
In your Storepoint store locator app account, navigate to the "Manage Locations" page at https://storepoint.co/dashboard/locations
If you don't already have an account with Storepoint to create your store locator for Joomla, you can create one here: https://storepoint.co/signup

Here you can click "Add A Location" (top left) to add a location or if you have many locations, it would be better to use the "Bulk Upload Locations" tool to upload from a spreadsheet/excel file or use our google sheets sync feature:
Bulk Upload Locations: Simply fill out a spreadsheet with your location info and upload it using our "Bulk Upload Locations" tool.
Google Sheets Sync: You can also create a store locator from locations in a google sheet, learn more about our google sheets sync integration here: https://storepoint.co/help/create-locator-map-from-google-sheets
Step 2: Add the store locator map to your Joomla website
Now that we've added a few locations, you can now setup the joomla store locator map on your website.
- In the Storepoint dashboard, copy your embed snippet from the "Embed Map" page, also accessible here when logged in: https://storepoint.co/dashboard/map
- Now, simply login to your Joomla admin panel and create a new page (article) where you want your store locator to display or go to the existing article where you'd like to add your store locator.
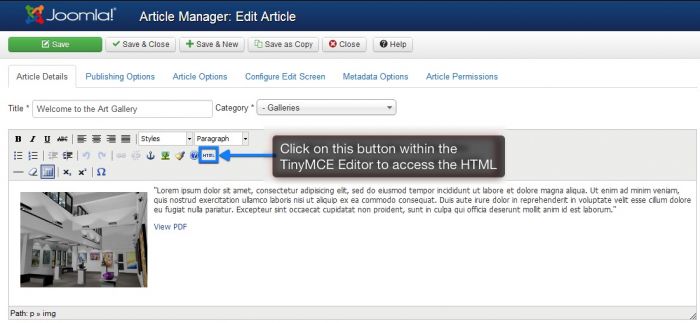
- Now that you're on the article where you'd like to add your store locator, click the "HTML" button on the editor

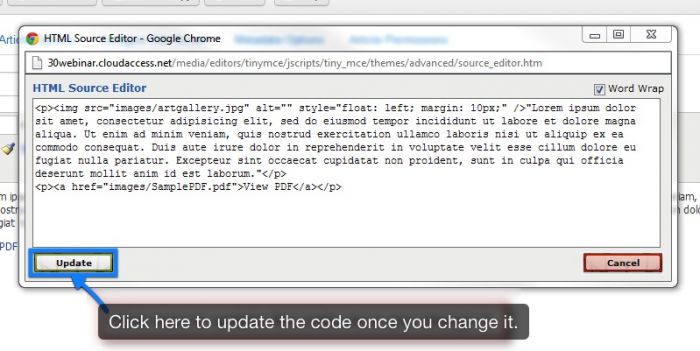
- Paste the embed snippet we copied from Storepoint in the first point and click "Update"

- All done! Your Joomla store locator will now display on this article/page.