Add a store locator app to any Shopify page in a few minutes. Your Storepoint locator updates straight from your dashboard whenever your locations change, so the storefront you built stays exactly as you built it.
Use it as a store locator, retailer finder, where-to-buy product locator, dealer page, or stockist directory. Drops into a Custom Liquid section in the theme editor on modern themes, or into the page content editor on every Shopify theme.
Start your free trial See examples and features
Step 1: Set up your locator
- Create a Storepoint account and follow the prompts (you'll pick a map provider and a few basics), or log in if you already have one
- Add your locations: type them in, import a spreadsheet, or sync from Google Sheets
- Open Embed in the dashboard sidebar and copy your snippet
Step 2: Create your locator page
- In Shopify admin, go to Online Store > Pages
- Click Add page (or open an existing one)
- Name it something visitors will recognise: "Find a Store", "Where to Buy", "Stockists", "Find a Retailer"
You'll add the embed in the next step. Don't worry about the content area yet.
Step 3: Paste the embed (pick your path)
Path A: Theme editor with Custom Liquid (recommended for 2.0 themes)
This is the cleanest path on Online Store 2.0 themes (Dawn, Craft, Sense, Refresh, Studio, and most modern themes).
- Go to Online Store > Themes and click Customize on your live theme
- In the top dropdown, switch from "Home page" to Pages > [your locator page]
- Click Add section in the left sidebar
- Search for Custom Liquid and add it
- Paste your Storepoint snippet into the Liquid code field
- Click Save
The locator renders right inside your theme's layout, with your header, footer, and section spacing intact.
Older themes (1.0 / vintage) don't have Custom Liquid. Use Path B below.
Path B: Page content editor (works on every theme)
- In Online Store > Pages, edit your locator page
- In the content editor toolbar, click Show HTML (the
<>icon) - Paste your Storepoint snippet
- Click Save
If you paste into the visual editor instead of HTML view, Shopify converts the script tags to escaped text and the locator won't load. Click Show HTML, then paste.
Step 4: Link it from your menu
To help shoppers find it:
- Go to Online Store > Navigation
- Open your Main menu
- Click Add menu item
- Name it ("Find a Store", "Where to Buy") and link it to your page
- Save menu
Open your storefront, try a search, you're live.
Make it full width
If your locator feels squeezed inside your theme's content column, the Custom Liquid path solves this best. Place the section directly on the page (not nested inside a content block) and it will follow your theme's section width by default.
For Path B users on the page editor, switch your page template to a wider variant if your theme offers one (look for "page.full-width" or similar in the Theme dropdown on the page).
Selling in multiple languages?
Add your translations once in Phrases Pro and the locator picks up the right language for each Shopify Market on its own. French shoppers see French. German shoppers see German. Same embed, no extra setup. More on translations →
Match your theme
Style it yourself from the dashboard: map style, marker pins, colors, button shapes, layout. Full CSS access is open on every plan, so designers can match brand specs exactly.
Send us your Shopify store link and we'll match your locator to your theme. Fonts, colors, button radius, header behavior. Comes with every plan. See examples →
Common questions
Which Shopify themes does this work on? Every theme. The Custom Liquid path (Path A above) works on Online Store 2.0 themes, which covers Dawn, Craft, Sense, Refresh, Studio, and most themes built or updated since 2021. The page editor path (Path B) works on every Shopify theme, including older 1.0 / vintage themes.
Need a hand?
Email us at [email protected]. We're a small team and we handle support ourselves, so the reply comes from someone who actually built Storepoint.
Next steps
- Filters and tags so shoppers can narrow by product, retailer, or category
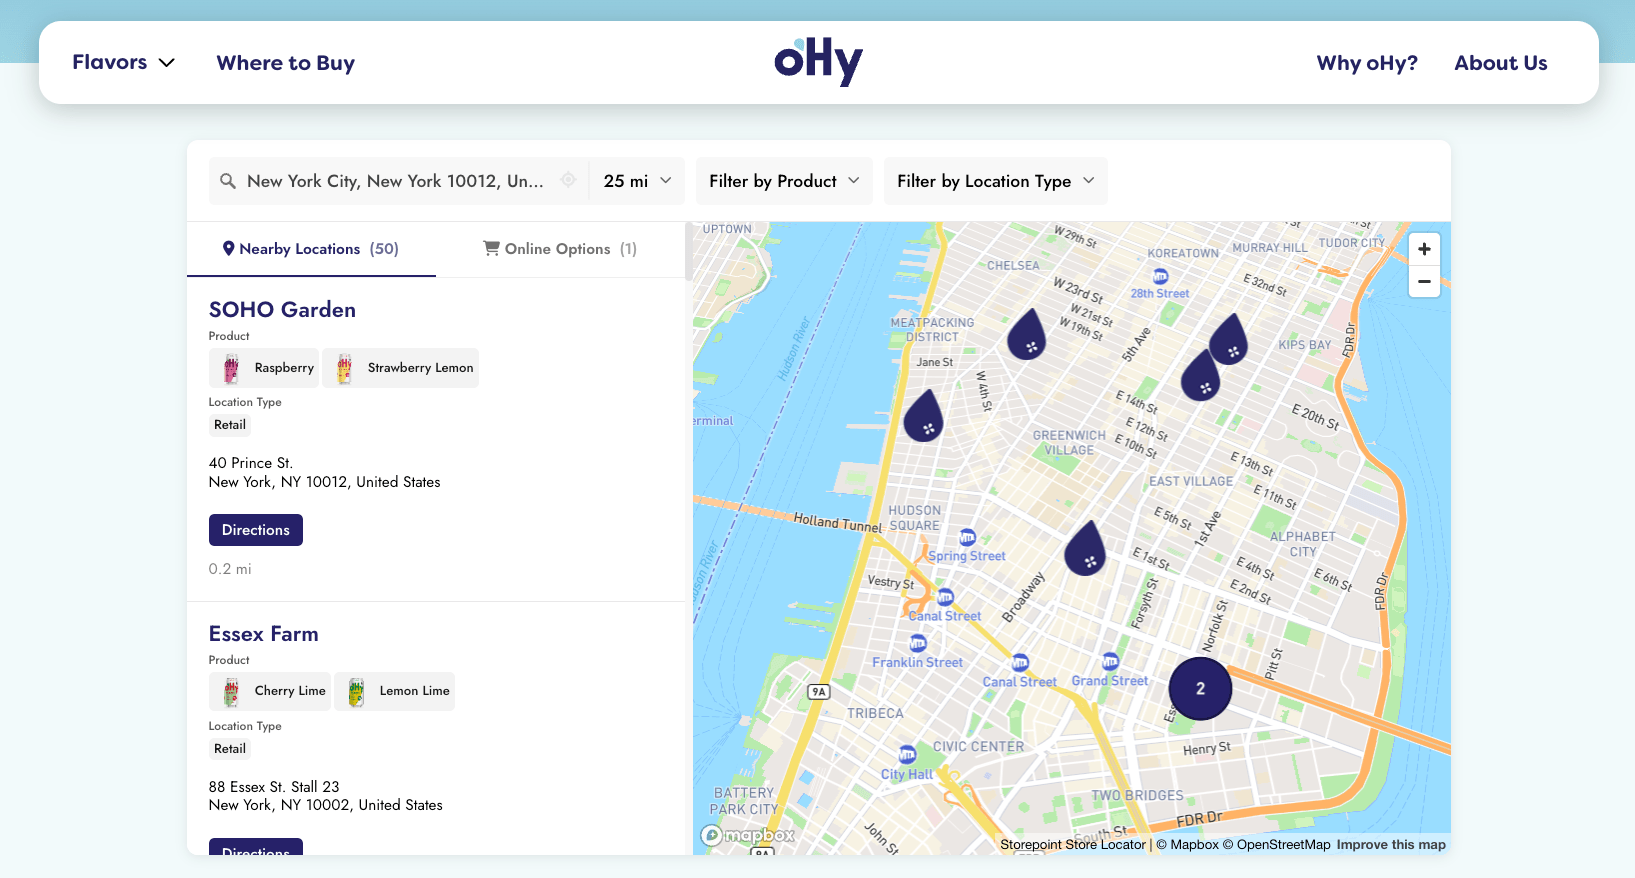
- Build a where-to-buy page with product filters and purchase links
- Map styles and custom pins from the dashboard
- Embed options for filtered or multilingual locators
- Real Shopify locators for inspiration