Show a different marker on the map for any group of locations. Each brand can show its own logo. Each dealer can show its own pin. Each tier, store format, or service type can have its own color or icon. The map matches however you organize your locations.
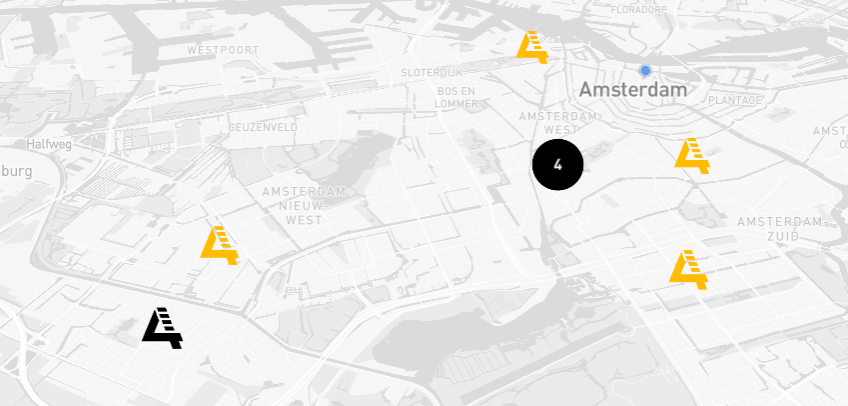
It works through tags. Tag your locations the way you want to group them, then attach a color or image to each tag. The map updates from there.
Before You Start
You'll need a Storepoint account. Storepoint is a store locator and dealer finder widget that embeds on your website. If you're new, start a free trial and follow the Quick Start Guide.
Start Your Free Trial See Examples
What You Can Set Up
A few common ways customers use this:
- Per brand or banner. A retailer with multiple brands, or a parent company with multiple banners, shows each brand's logo on the map. Tag the location with its brand, upload the logo, done.
- Per dealer or distributor. A manufacturer's locator displays each dealer's own logo, right on their location. Customers see the dealer's branding the moment they look at the map.
- Per dealer tier. Premium gets gold, Certified gets green, Authorized gets blue. Partnership status reads at a glance.
- Per location type. Retail stores vs warehouses vs corporate offices. Showrooms vs service centers vs pickup points. Restaurants vs ghost kitchens vs food trucks. Whatever distinct kinds of places you run, each shows its own marker.
- Per store format. Within one brand, flagship stores get a special icon while express, kiosk, and full-format locations each get their own marker.
- Per primary service. A clinic locator shows different icons for primary care, urgent care, and pediatrics. A salon locator shows hair, nails, and skincare. Works best when each location specializes in one main thing.
Each location shows one map marker, so map icons fit best when there's one defining trait per place. If a single location belongs to many groups (a retailer that carries ten product lines, a salon offering many services), tag images are usually a better fit. Each tag can carry its own small image that shows in the filter dropdown and next to the tag on location cards. You can also run both at the same time: a clean map icon for the brand or location type, plus tag images for the products and services each store carries.
The setup is the same in every case: tag your locations, then create a marker rule for each tag.
Step 1: Tag Your Locations
Marker rules read your location tags to decide which marker to show. If your locations aren't tagged yet, you can add tags when editing a location, importing, or syncing from Google Sheets. See Filters & Tags for the full setup.
A few tagging examples:
-
Brand or banner logos: tag each location with its brand (
acme-coffee,acme-roasters,acme-express) -
Dealer logos: tag each location with its dealer (
smith-motors,johnson-auto,riverside-dealers) -
Tiers:
premium,certified,authorized -
Store formats:
flagship,express,kiosk
If a tag exists only to drive marker rules (and shouldn't appear in the filter dropdown or on location cards), open the relevant tag group in Tags & Filters and enable both "Hide Filter" and "Don't Show In Location Details". The tag still controls the marker, but visitors won't see it.
Step 2: Open Map Marker Settings
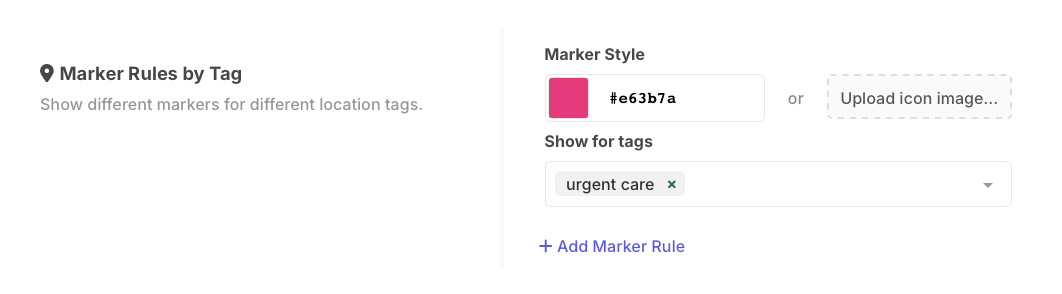
Head to Map Style & Markers in your dashboard and scroll down to Marker Rules by Tag.
Step 3: Create a Marker Rule
Click Add Marker Rule. Fill in two fields:
- Marker style. Pick a color from the color picker, or upload a custom PNG. Your brand logo, a dealer logo, a product image, a category icon. Either option works.
- Tags. Choose the tag (or tags) that should display this marker. Any location with those tags shows this pin instead of your default marker.
For per-brand logos, create one rule per brand. For per-dealer logos, one rule per dealer. The rule structure stays the same; the number of rules is up to you.
Step 4: Add More Rules
Click Add Marker Rule again for each additional brand, dealer, tier, or category. Add as many as you need.
If a location matches more than one rule, the first rule wins. Drag rules to reorder them. See rule priority for the full logic.
Step 5: Save and Preview
Click Save Settings and open your locator. Each tagged location now shows its assigned marker. Locations without a matching tag use your default map marker, set at the top of the same settings page.
Custom Icon Tips
If you're uploading icons (brand logos, dealer logos, product images):
- Use PNG format with a transparent background
- 40-60 pixels displays well on the map. Design at 2x (80-120 pixels) for sharp rendering on retina screens
- Keep the design bold and simple, since fine detail gets lost at marker size
- Need a quick design? Try our free marker generator
For more icon design tips, see best practices.
Common Questions
Can I show a different icon for different locations?
Yes. Tag each store with a unique tag and create a marker rule per tag. Most customers do this at the brand or dealer level (one logo per brand, one logo per dealer), but per-store works the same way.
Can I use my brand or dealer logo as a marker?
Yes. Upload it as a PNG. Bold, simple logos work best because markers are small. Detailed logos may not stay legible at this size.
What about locations with no matching tags?
They use your default map marker, set at the top of the same settings page.
Can I mix colored pins and custom logos in the same locator?
Yes. Each rule chooses its style independently. You might use logos for your three main brands and colored pins for three dealer tiers in the same map.
Do my brand or dealer tags need to appear in the filter dropdown?
No. If a tag exists only to control markers, hide it from filters and location details using the tag group settings. The tag still drives the marker behind the scenes.
Learn More
- Custom Map Markers documentation for marker sizing, clustering, and advanced techniques
- Filters & Tags for setting up location tags and groups
- Priority Sorting to feature specific tagged locations at the top of results