Tag locations by product, service, specialty, dealer tier, or any category you use. With tags and filters, you can:
- Add filters. Let visitors choose which locations to see.
- Show location details. Display tags as text, colors, or images on location cards.
- Set map icons. Give locations with a certain tag their own pin color or image.
- Set which locations appear first. Use tags to give selected locations priority in search results.
Use any mix of these options. You can use tags just for map icons or sorting, or also show them in filters and on location cards.
On this page
- Add tags to locations
- Group your tags
- Create a filter
- Show tags on location cards
- Style the tags visitors see
- Choose how filters work together
- Map icons, sorting, and filtered locators
Add tags to your locations
Add the tags that apply to each location. For example, a provider could have tags for its specialties and certifications. A dealer could have tags for its tier and services.
- Open your dashboard and go to Locations.
- Select a location. In Add Tags, type a tag and press Enter. Repeat for each tag.
- Click Save Changes.
Use the same tag on every location it applies to. For example, add Premium to each premium dealer.
Use the columns you already have. When you import or connect your location list, map one or more columns to Tags. Storepoint combines them for each location. You can also use one tags column with values separated by commas.
Group your tags
Keep related tags together in groups such as Products, Specialties, or Dealer tiers. New tags start in the Default group. Use that group or create your own.
- Open Tags & Filters in your dashboard.
- To create a group, click Add Tag Group and fill in Tag Group Name.
- Drag tags into the group they belong to.
- Choose the order by dragging. Move groups to change their order, or move tags within a group to order its options.
- Click Save Changes.
Storepoint remembers the groups and order you save. When you add an existing tag to another location, it stays in the same group.
Create a filter
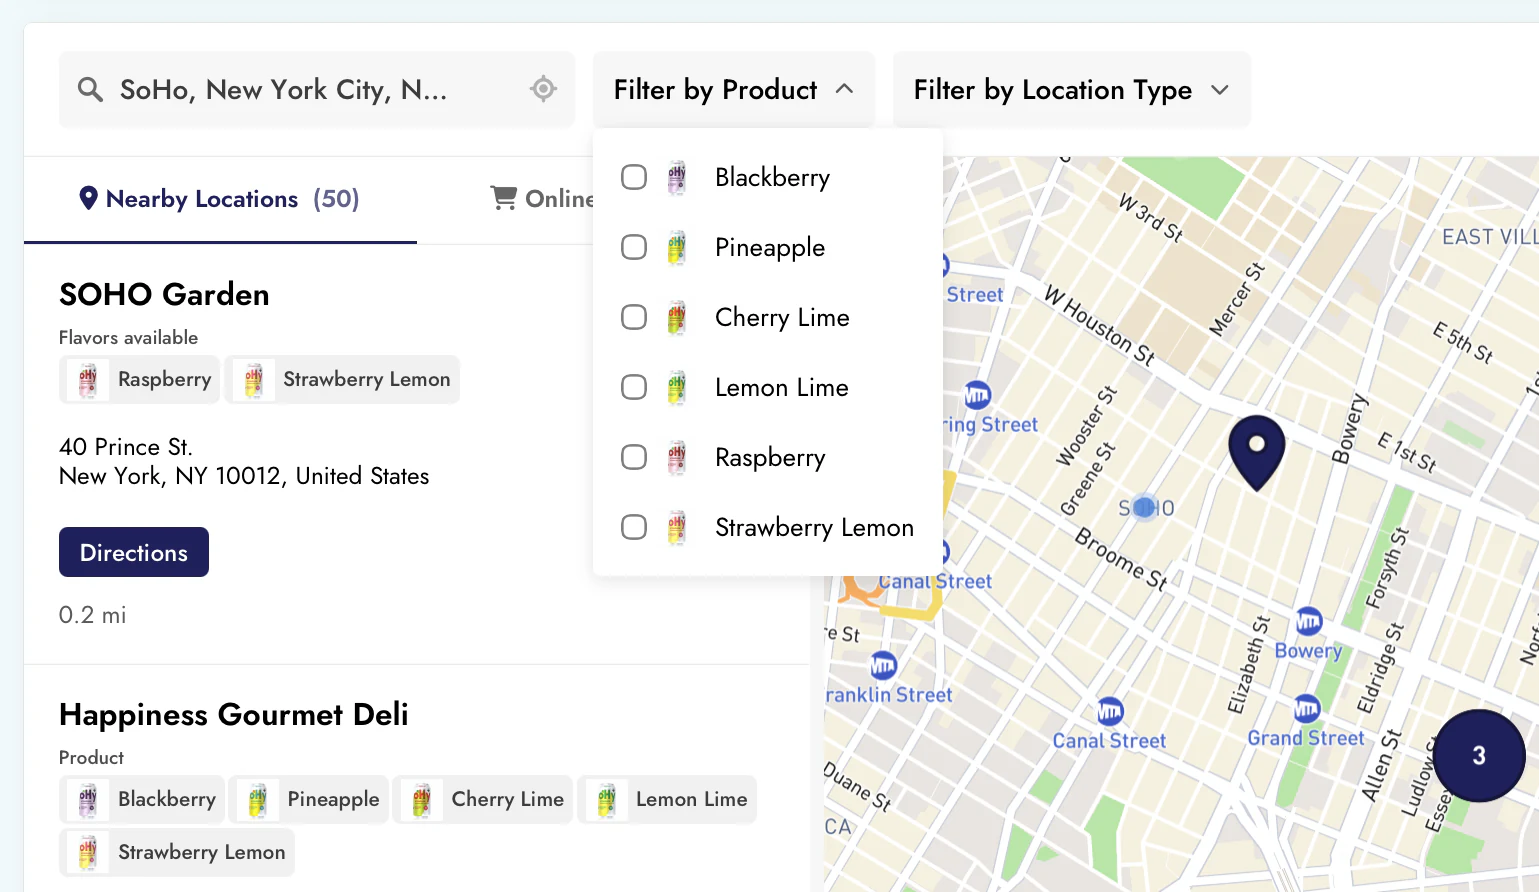
Each group appears as a filter by default. The tags in that group become the options visitors can select.
In Tags & Filters, choose these settings for the group:
- Hide Filter: leave it off to show the filter. Turn it on to hide the filter.
- Filter Label: set the name visitors see, such as Filter by specialty.
- Display inline: leave it off for a dropdown menu. Turn it on to show the options as checkboxes.
Click Save Changes. When visitors select an option, the map and list show matching locations.
Show tags on location cards
Tags also appear on location cards by default. Each location shows only the tags you’ve added to it.
In Tags & Filters, choose these settings for the group:
- Hide in Location Details: leave it off to show the tags on location cards. Turn it on to hide them.
- Tag Group Name: set the heading above the tags, such as Products or Specialties.
Click Save Changes. This choice is separate from your filter settings. For example, you can show product tags on location cards while visitors filter by location type.
Turn on both Hide Filter and Hide in Location Details for that group. The tags stay hidden from visitors and can still be used for map icons and priority sorting.
Style the tags visitors see
In Tags & Filters, find the tag you want to style:
- Tag label: set the text visitors see.
- Color: choose a color for the tag.
- Image: click the image box to add a photo, logo, or icon.
Click Save Changes. The styling applies wherever the tag is visible—in filters, on location cards, or both.
To use a tag for a pin color or image on the map, set up map icons by tag.
Choose how filters work together
Filter Logic controls which locations appear when visitors select more than one filter option.
For example, a visitor selects Paint and Tools under Products, and Delivery under Services:
| Setting | Locations shown in this example |
|---|---|
| AND | Stores with Paint and Tools and Delivery. Every choice must match. |
| OR | Stores with Paint, Tools, or Delivery. Any one choice can match. |
| OR within each filter, AND across filters | Stores with Paint or Tools that also provide Delivery. At least one choice from each filter must match. |
- Open Widget Settings → Search & Map Functionality.
- Under Filter Logic, select an option. AND is the default.
- Save your settings and try the filters on your locator.
Do more with tags
- Map icons by tag. Give tagged locations their own pin color, logo, or image. Set up map icons.
- Priority sorting. Show selected locations first in nearby search results. Set up priority sorting.
- Filtered locators. Show only locations with selected tags on any page of your website. Create a filtered embed.
- Prefiltered links. Share a link that opens your locator with filters already selected. Create a prefiltered link.
- Spotlight. Promote tagged locations in chosen areas or on set dates. Explore Spotlight.
Setup questions
How do I update a location’s tags later?
Edit its tags in the dashboard and save. For locations managed by an import or sync, update the tags in the source file or connected tool. Your locator uses the new tags after the update runs. See how to update imported locations.
Can I change the name visitors see while keeping my original tags?
Yes. Change Tag label in Tags & Filters. Visitors see the new label, while your location data and rules keep using the original tag.
How do I remove a tag or group?
Remove a tag from the locations that use it. Once no locations use it, it leaves your tag list. If you use a connected source, remove the tag there and sync your changes.
To delete it everywhere at once, use the tag’s trash icon in Tags & Filters and type its name to confirm. This removes it from all locations and online stores and cannot be undone.
To remove a group you created, move its tags to another group. Click the empty group’s trash icon, then Save Changes. The tags stay on your locations.