Want customers to book appointments directly from your location finder? Whether you run a salon directory, medical provider locator, fitness studio finder, or any service business that takes appointments, adding a "Book Now" button is surprisingly simple. ✨
It works with any booking system you already use: Calendly, Acuity, Square Appointments, your own booking page, you name it.
Before You Start
You'll need a Storepoint account. Storepoint is an embeddable location finder widget for your website that lets you create a searchable provider directory, salon locator, clinic finder, or any type of location map. If you don't have an account yet, start a free trial and follow the Quick Start Guide to get set up.
Start Your Free Trial See Examples
Step 1: Create a Booking Button
First, you'll set up the button that will appear on your locations.
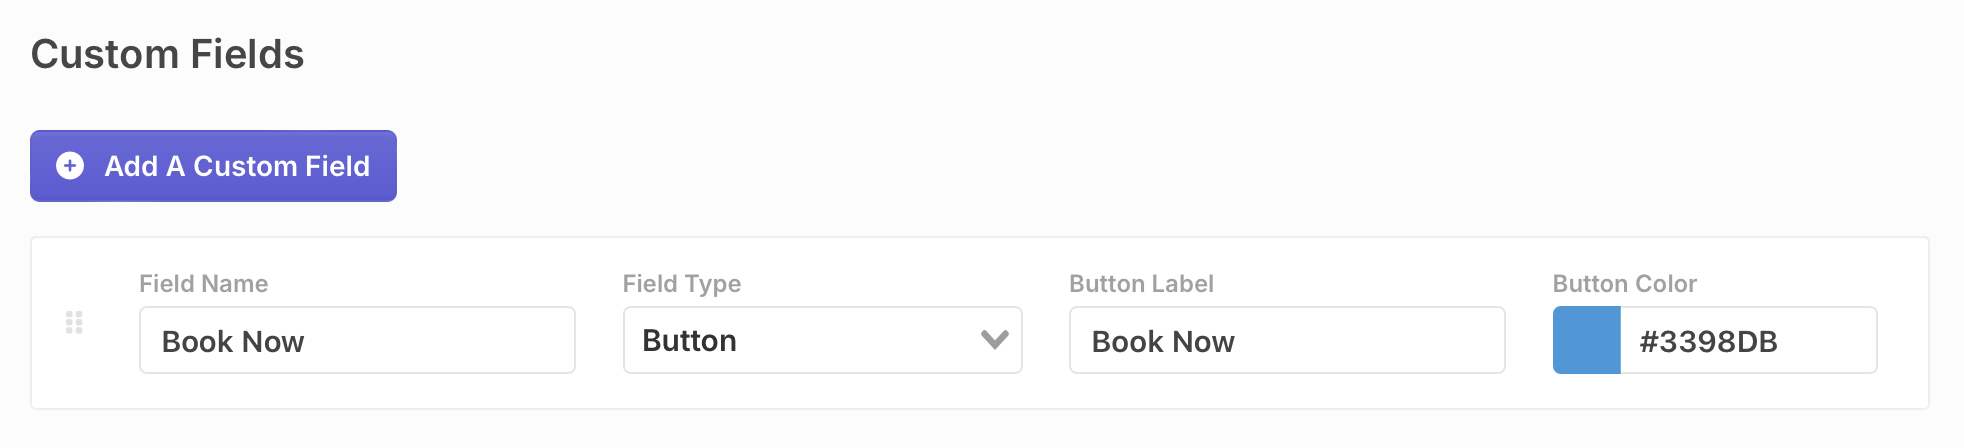
- Go to Custom Fields in your dashboard
- Click Add A Custom Field
- Select Button as the field type
- Enter a label like "Book Now" or "Schedule Appointment"
- Pick a button color that matches your brand
- Click Save Changes
That's it for setup! Now you just need to add the booking links to your locations. 🙌
Match your button color to your brand's primary action color for consistency across your website.
Step 2: Add Booking Links to Your Locations
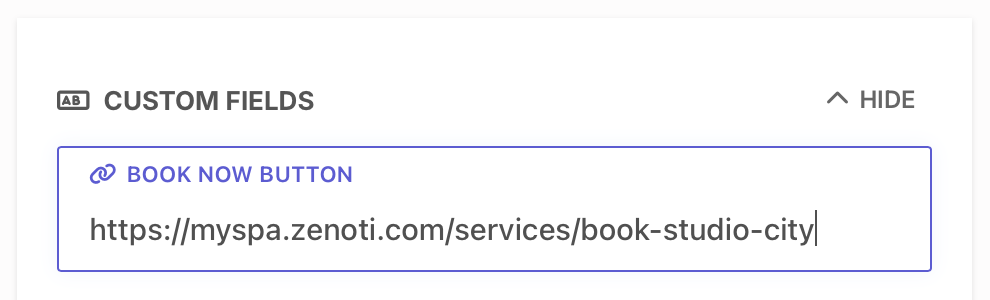
Once you've created the button, you can add booking links for each location. The button only appears on locations where you've added a URL, so you have full control.
In the Dashboard
Just edit any location and you'll see the new booking URL field. Paste your booking link and save.
Bulk Import
If you have many locations, download the import template. It includes your new booking field. Fill in the URLs and import.
Google Sheets Sync
Using Google Sheets sync? Download a fresh template from the sync setup page. It will include your booking field column. Add your URLs and sync.
Google Sheets sync makes managing booking URLs across multiple locations super easy. Update the spreadsheet, and your locator updates automatically.
That's It! 🎉
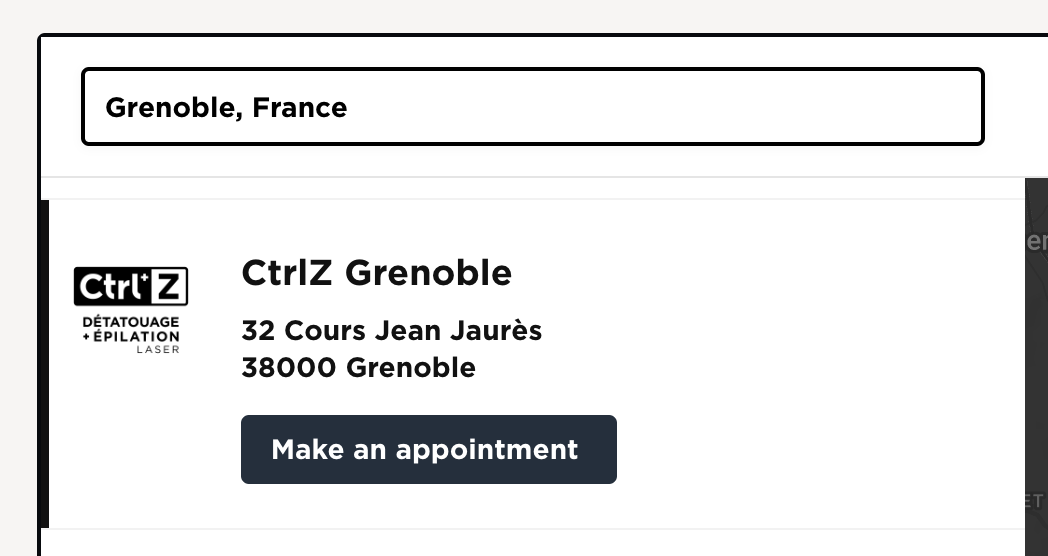
Your customers can now find a location and book an appointment, all in one seamless experience. The button appears right alongside the Directions button on each location card.
Common Questions
Can I have multiple booking buttons per location?
Yes! You can add as many button fields as you need. Perfect if you offer different types of appointments, like "Book a Consultation" and "Schedule a Service".
What booking systems does this work with?
Any system that gives you a booking URL. Calendly, Acuity, Square Appointments, Vagaro, Booksy, your own booking page, or any other platform.
Can I customize how the button looks?
You can set the button label and color in your dashboard. For advanced styling, you can also use custom CSS to perfectly match your brand.
Can I trigger popups or custom JavaScript actions?
Yes! If you have a developer on your team, you can use our Widget JavaScript API to listen for button clicks and trigger custom actions like booking popups, modals, or any other JavaScript behavior. This is great for integrating with booking systems that use popup embeds. Contact us if you need help setting this up.
Learn More
- Custom Fields documentation for all field types and options
- Google Sheets Sync for managing locations in a spreadsheet
- Import from Spreadsheet for bulk adding locations